Archived board. This is a read-only archive of the Fast Tracks forums, active 2004–2016. Posting closed in May 2016; the board was preserved as a static site in 2026. Some images were lost before archiving and are marked where they appeared.

Fast Tracks

Model Railroading Discussion Forums

Return To The Fast Tracks Website

The Fast Tracks discussion forums have been closed. Click Here for more information.

It is currently Thu Aug 06, 2026 12:00 am

All times are UTC - 5 hours [ DST ]


Forum locked This topic is locked, you cannot edit posts or make further replies.  [ 6 posts ] 
Author Message
 Post subject: 1:9 crossing in code 40
PostPosted: Mon Feb 18, 2013 7:35 am 
Offline
User avatar

Joined: Sun Sep 19, 2010 6:05 am
Posts: 51
Location: Rotterdam
📷 Image no longer available
Originally hosted at fbcdn-sphotos-g-a.akamaihd.net — the host went away before this archive was made.

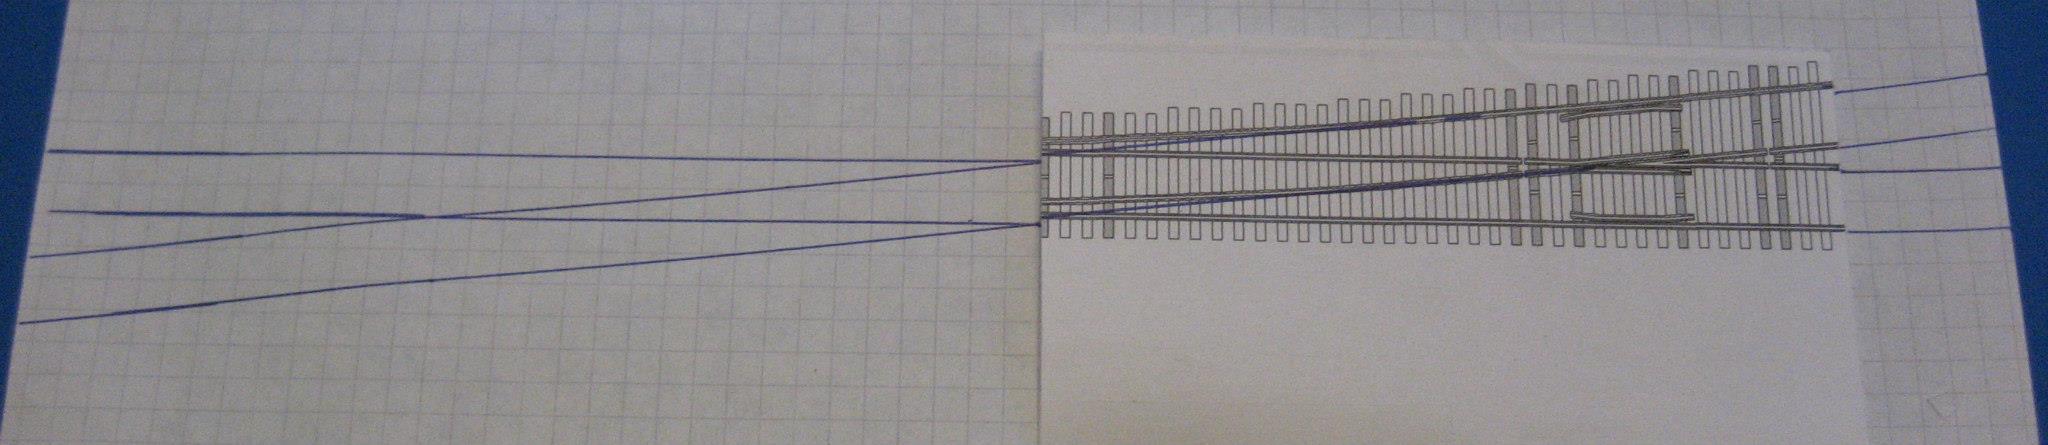
01-Settinp up the scheme for the crossing. I first put down the toprail and after that lined up a 1:9 point template over the lines
Image
02-One step is skipped here, namely the placing of the full point templates. This was done prior to this. After I had lined up the point templates I removed them and cut them to size to just no overlap
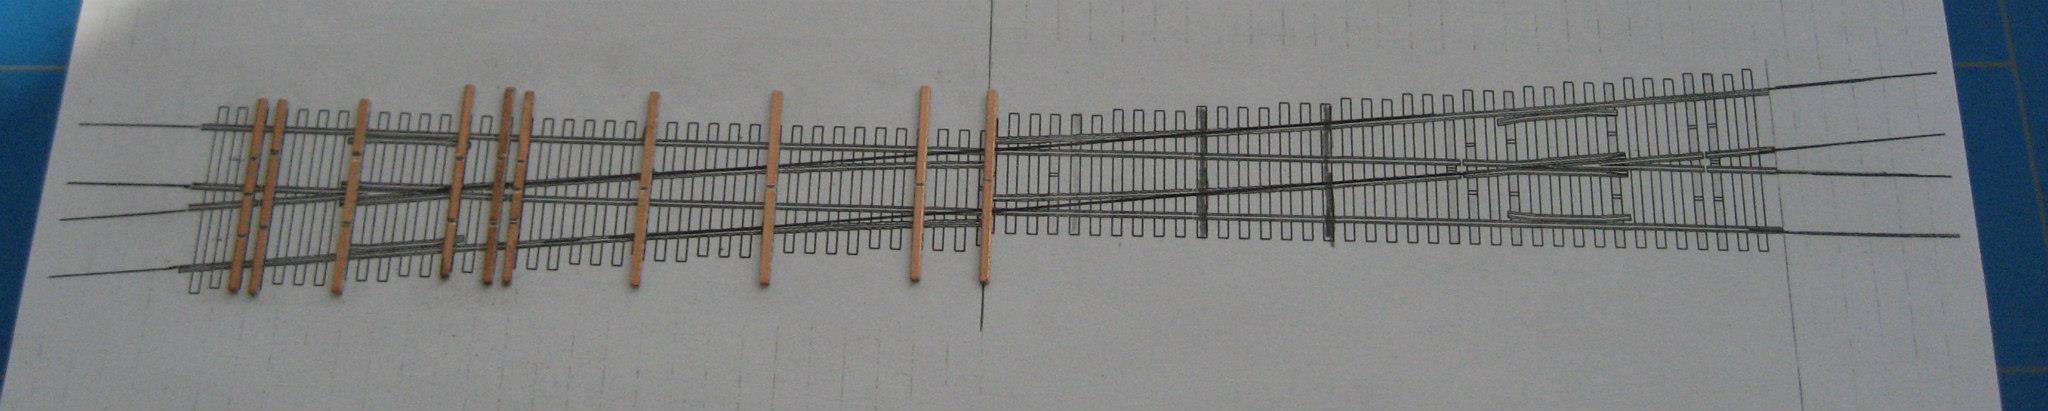
Image
03-I sprayed the template with 3M "Post-it" glue on a copy of the original template. Use a sheet of paper next to the crossing template to catch the overspray. Otherwise you will be working constantly with your hands sticking to the paper

📷 Image no longer available
Originally hosted at fbcdn-sphotos-d-a.akamaihd.net — the host went away before this archive was made.

04-The left half of the sleepers in place
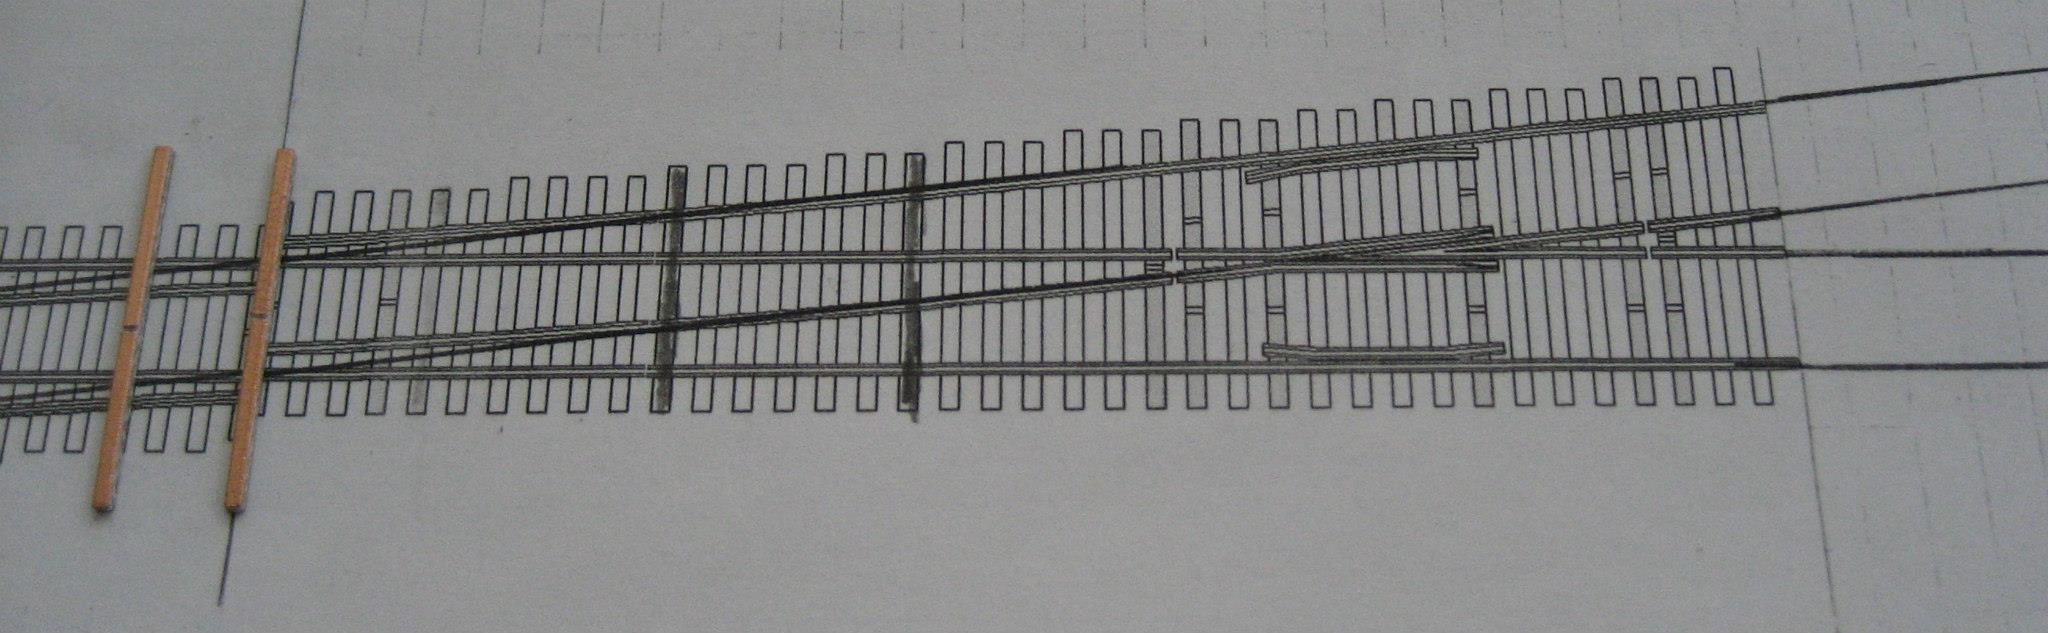
Image
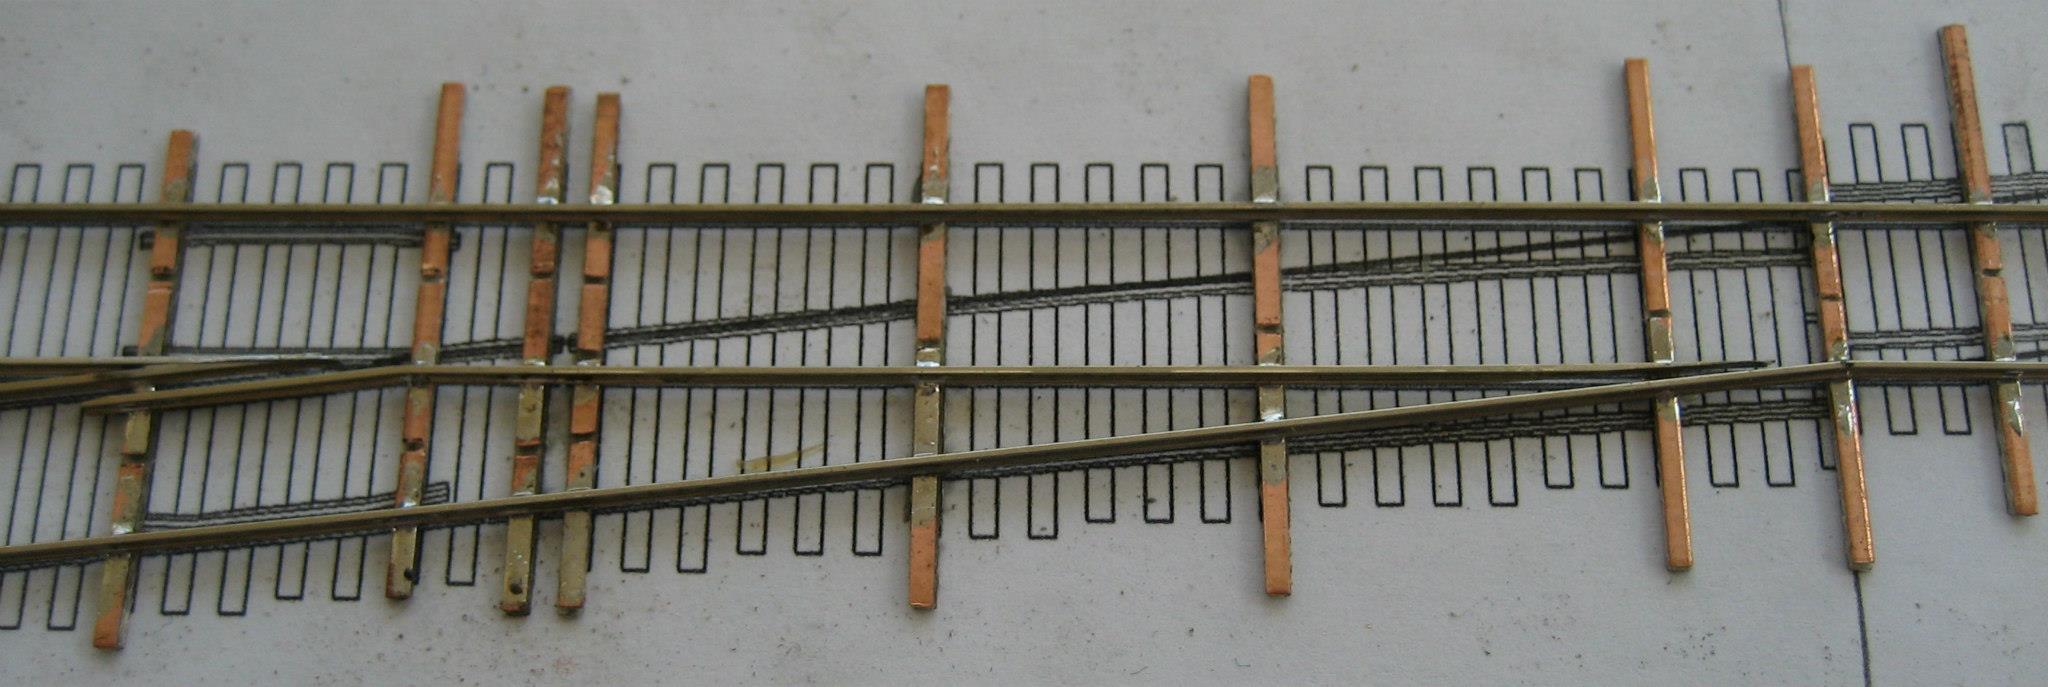
05-The right side still needs doing. The darker marked sleepers are additional sleeper. Those are missing on the 1:9 point as well. Given the thin rails I prefer to have a bit more body at those locations
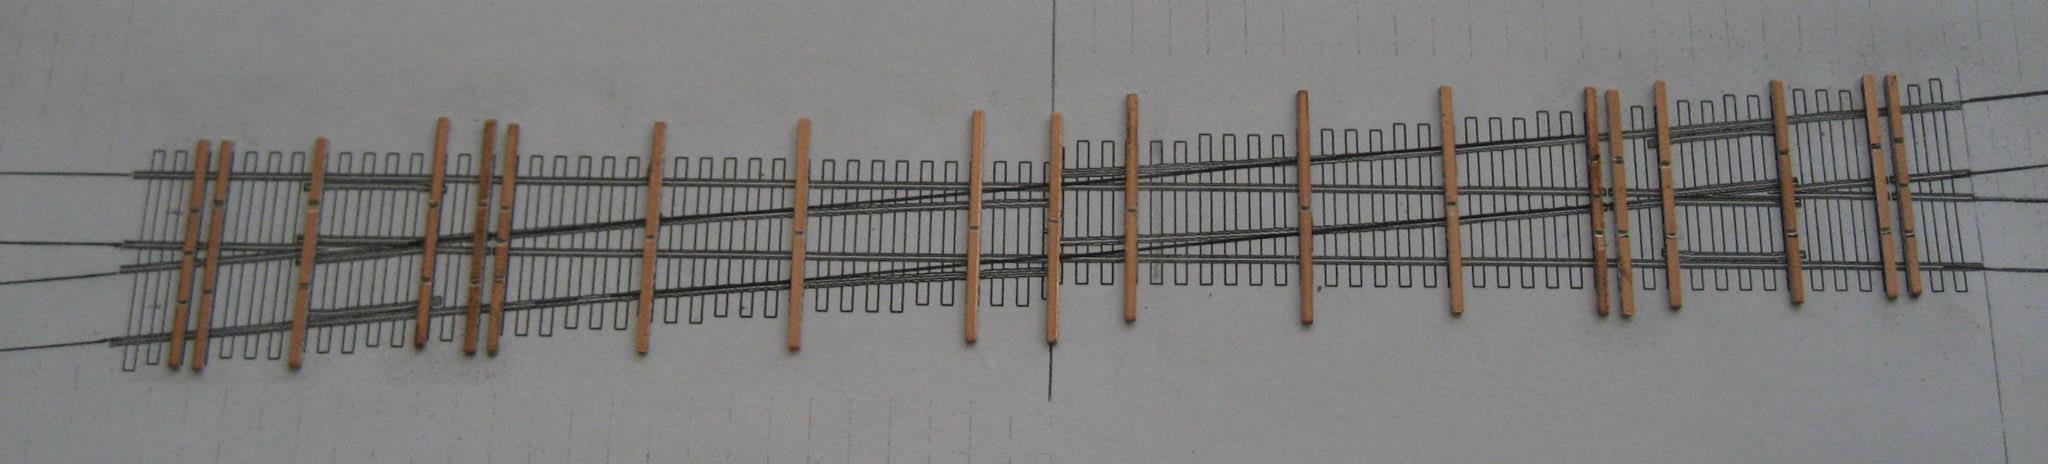
Image
06-The template provided with slepers

Image
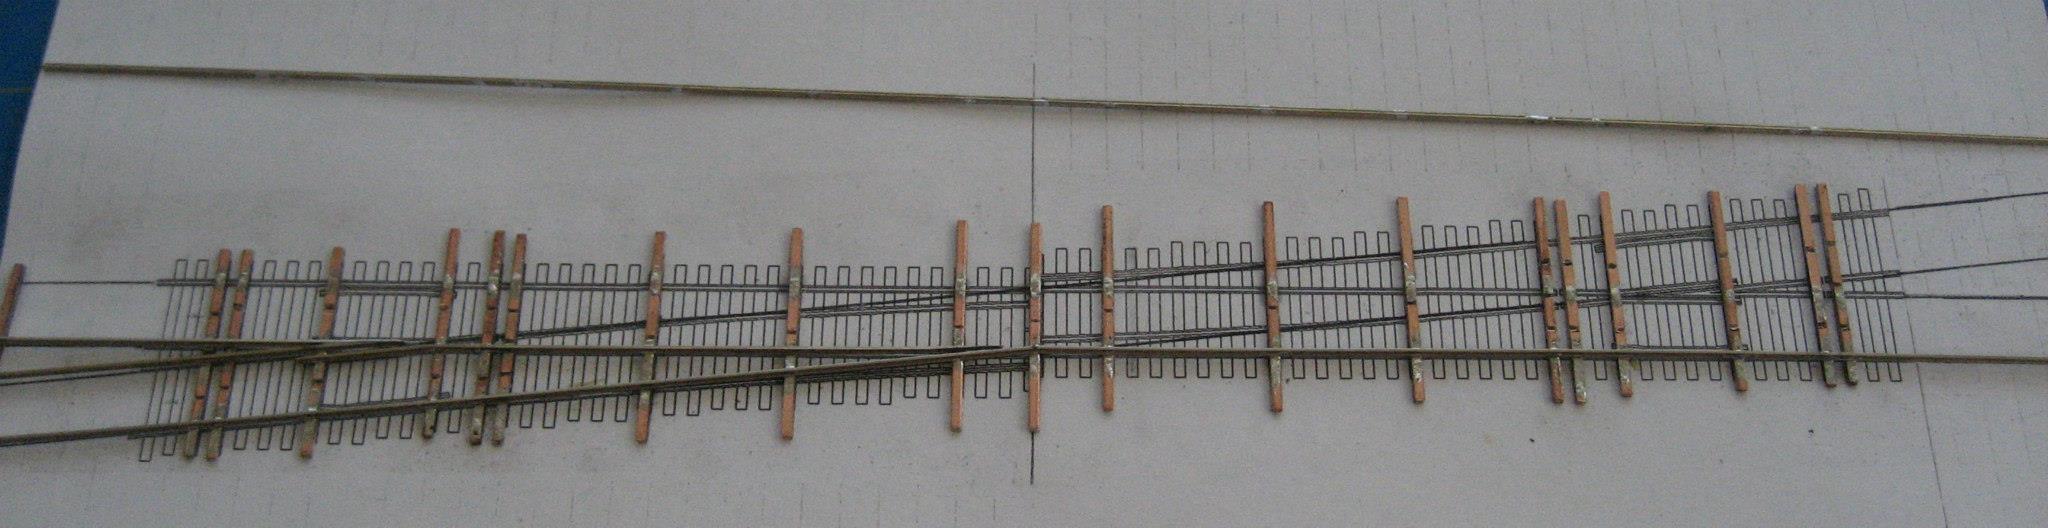
07-For ease of builing and lining up I put down a through going rail at first, this will later be replaced
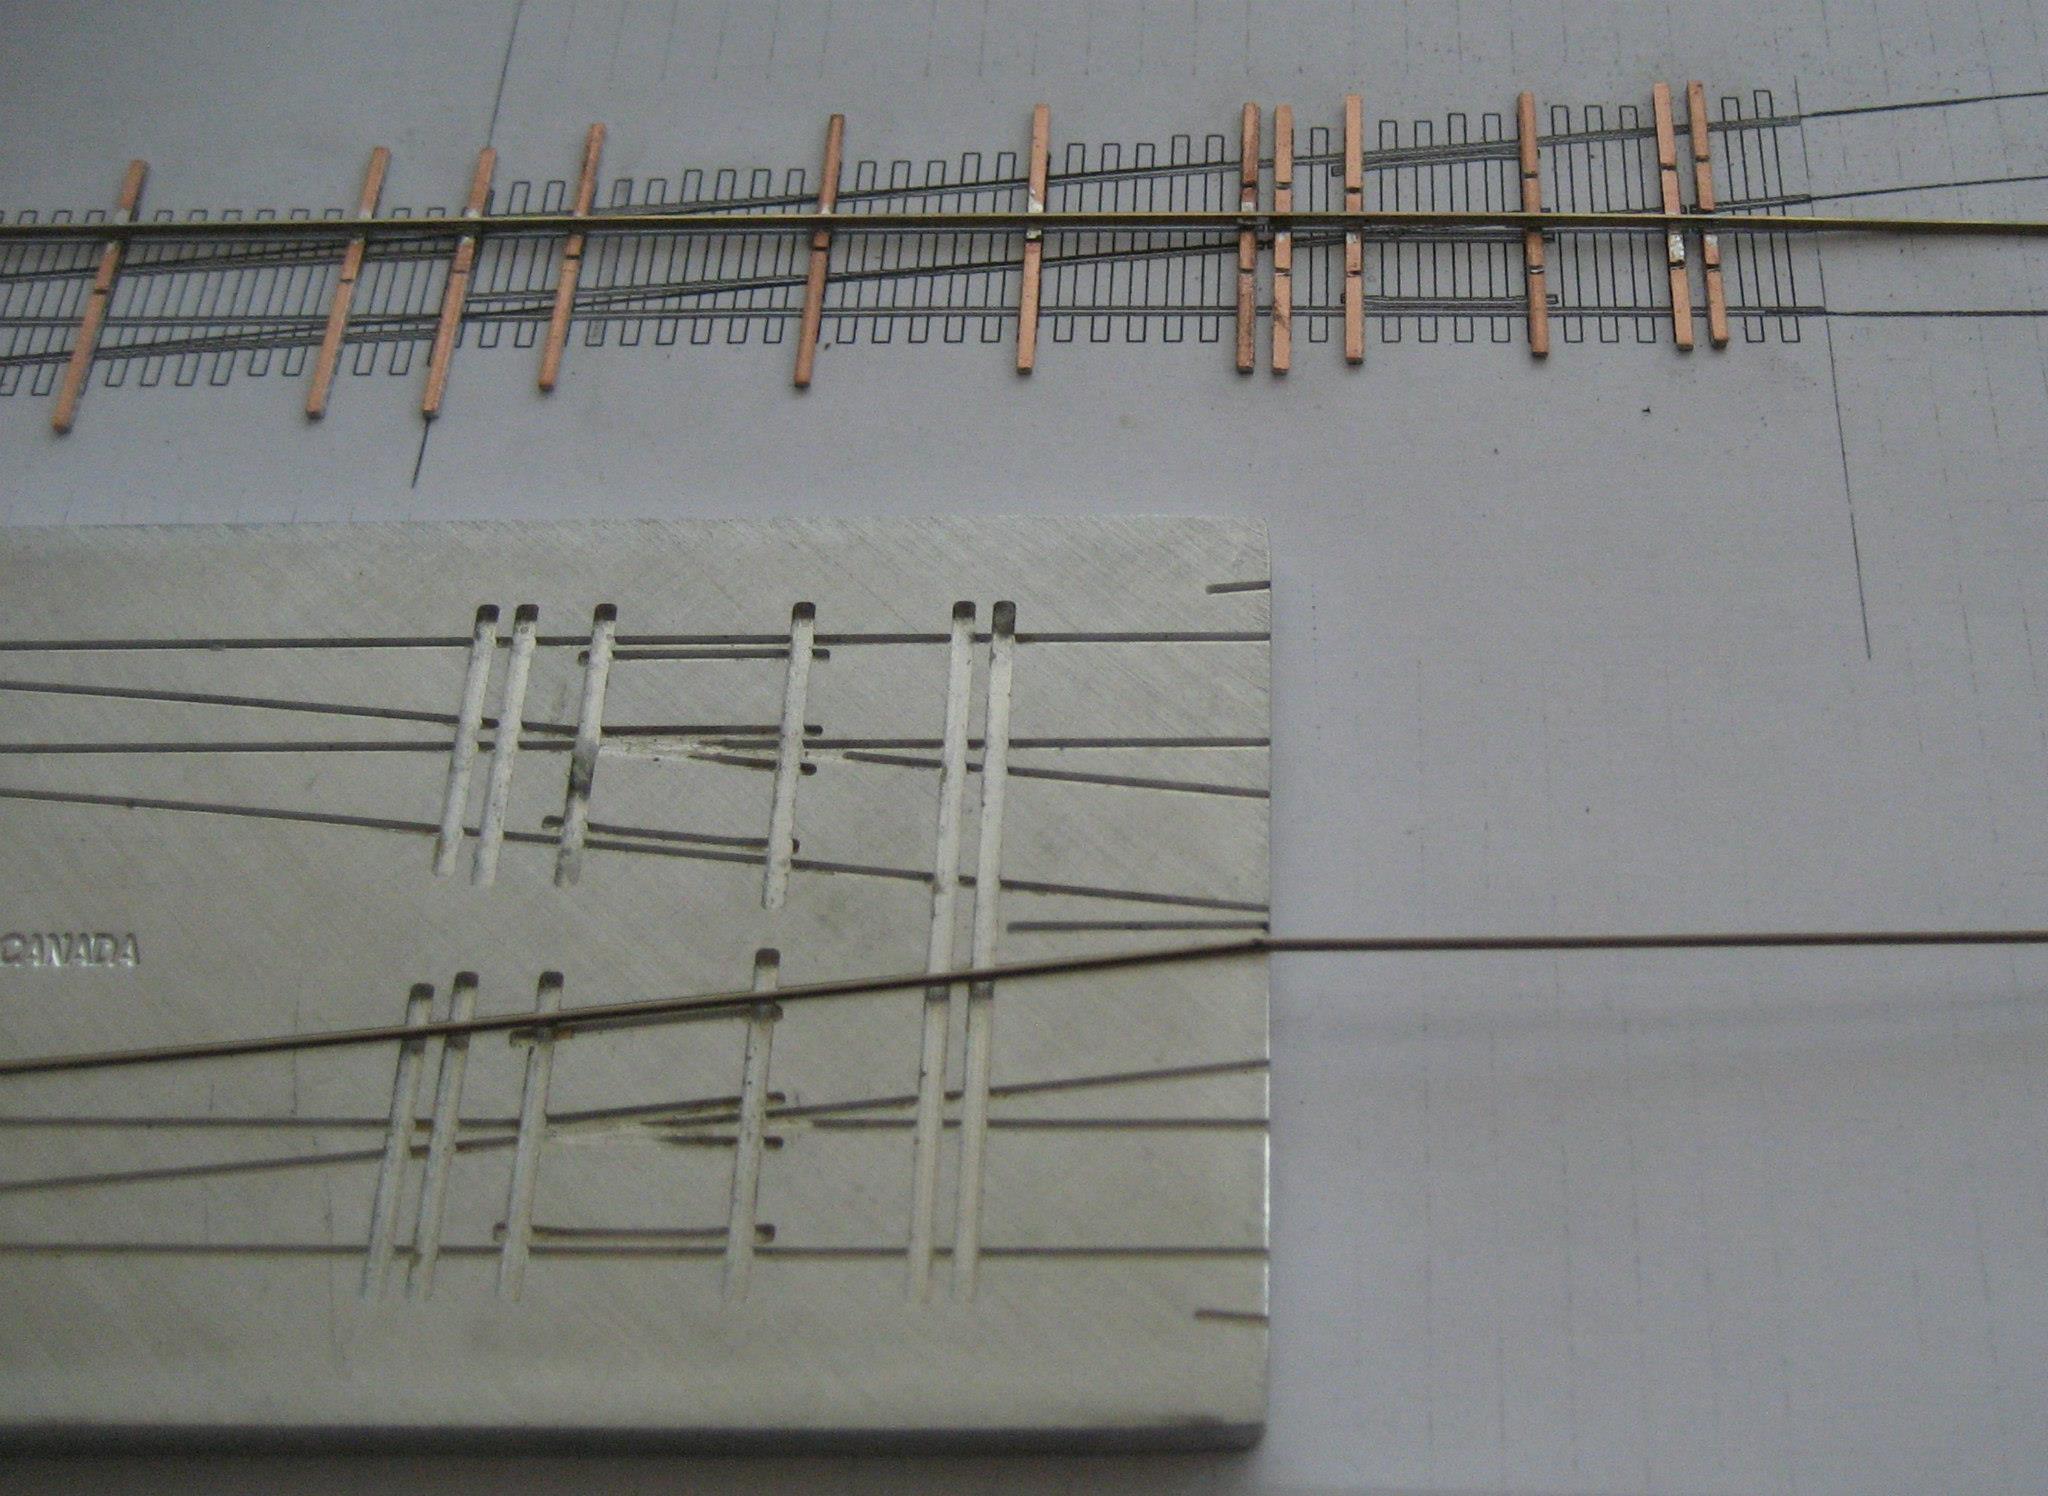
Image
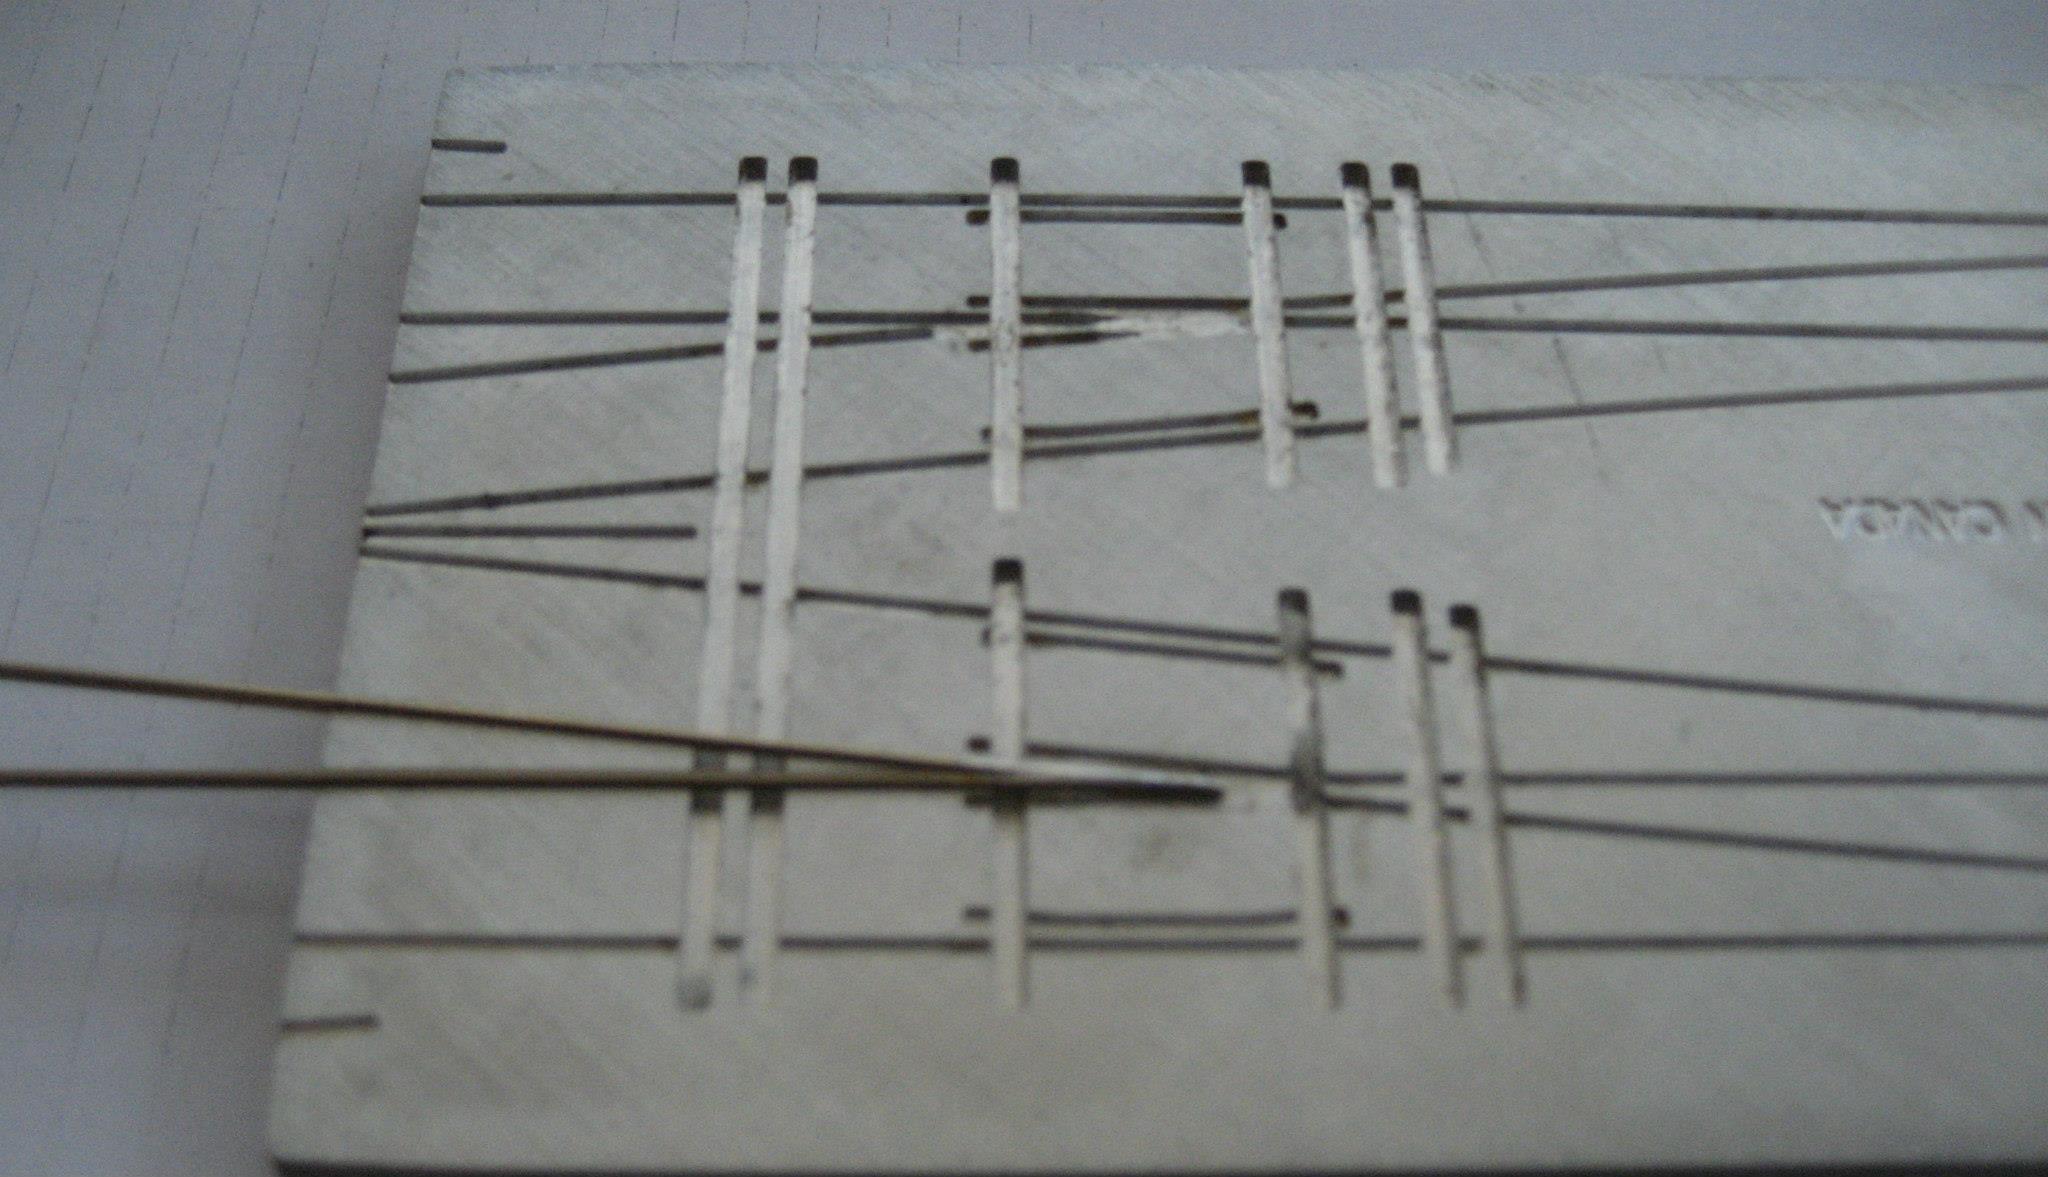
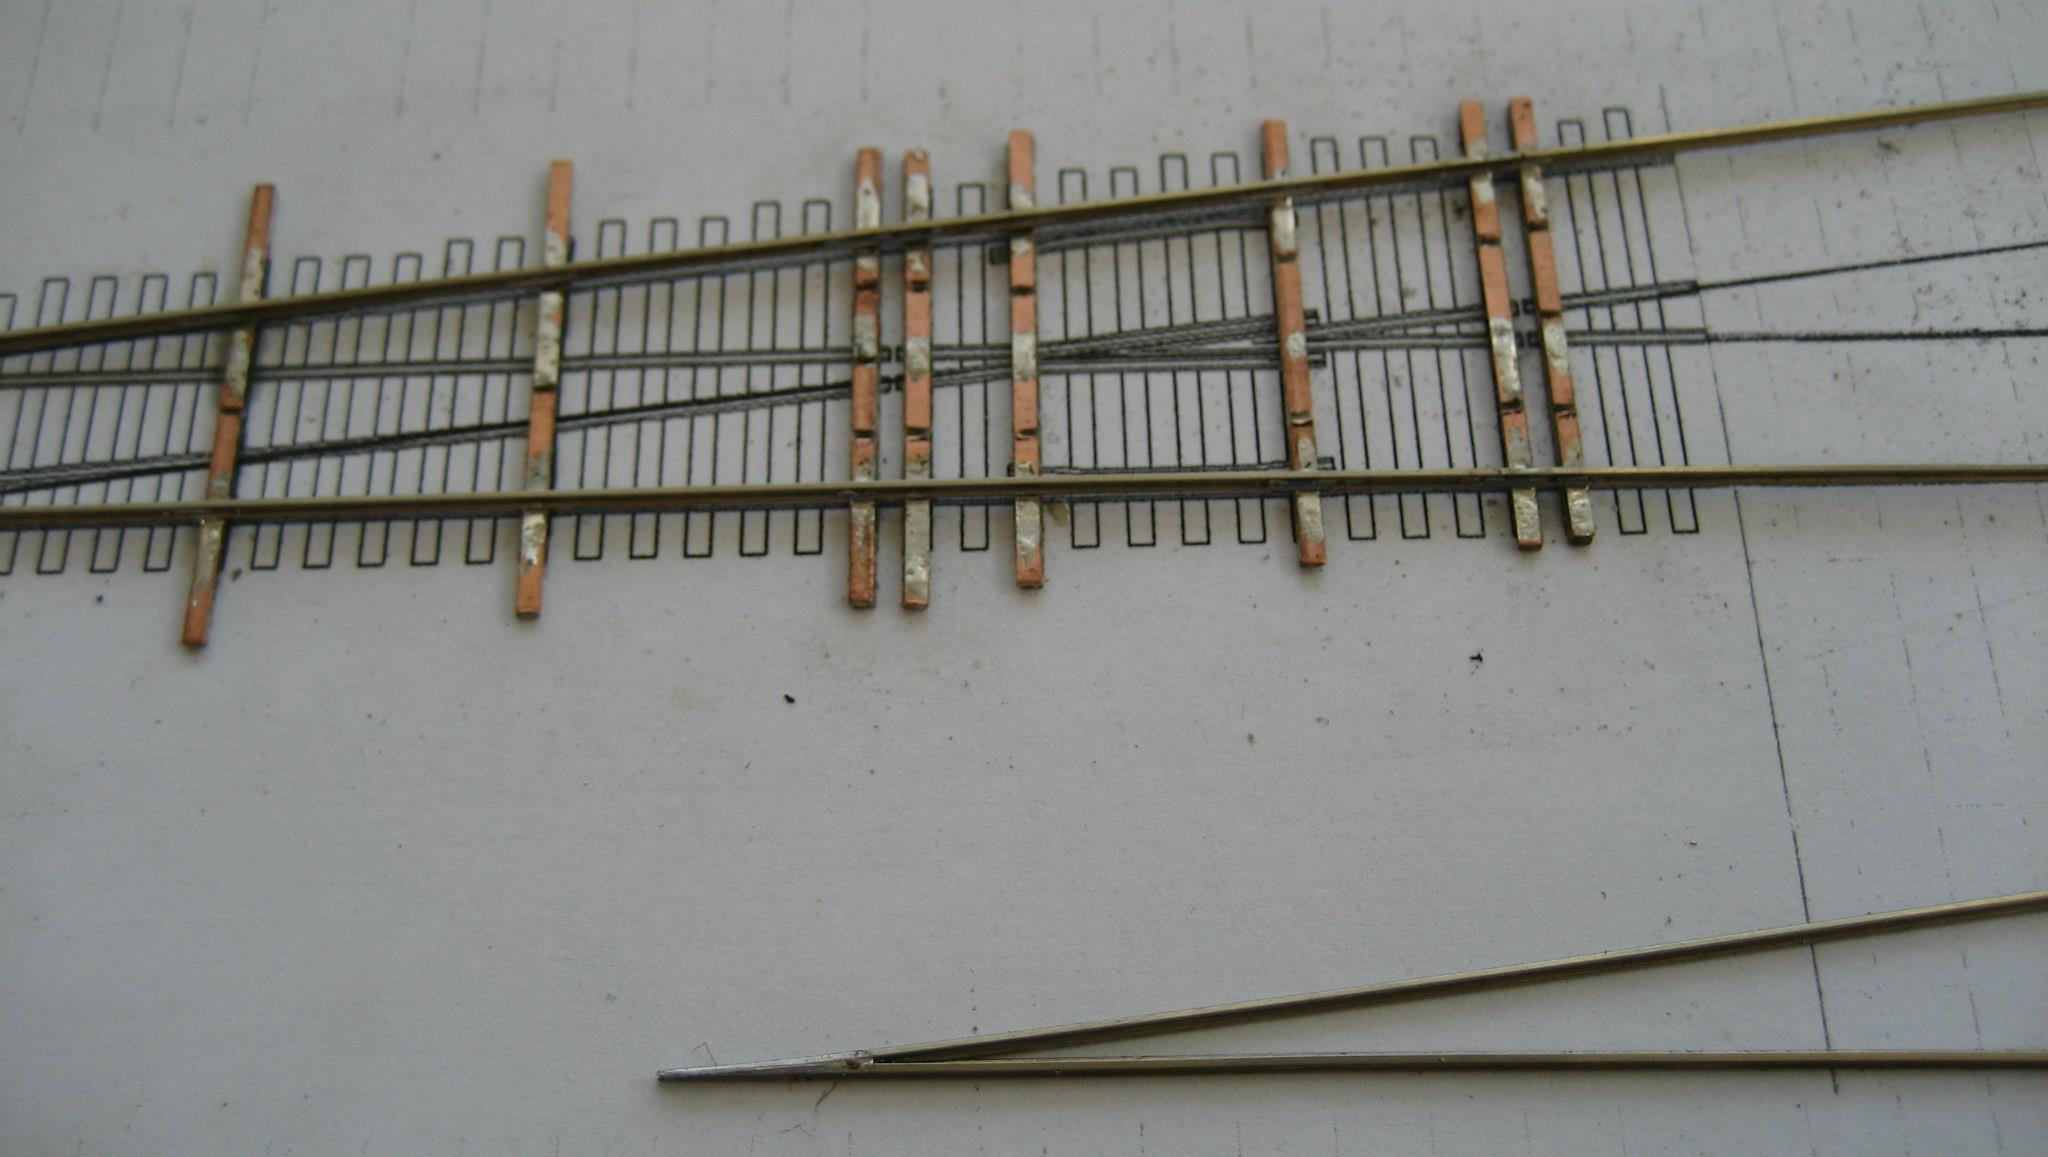
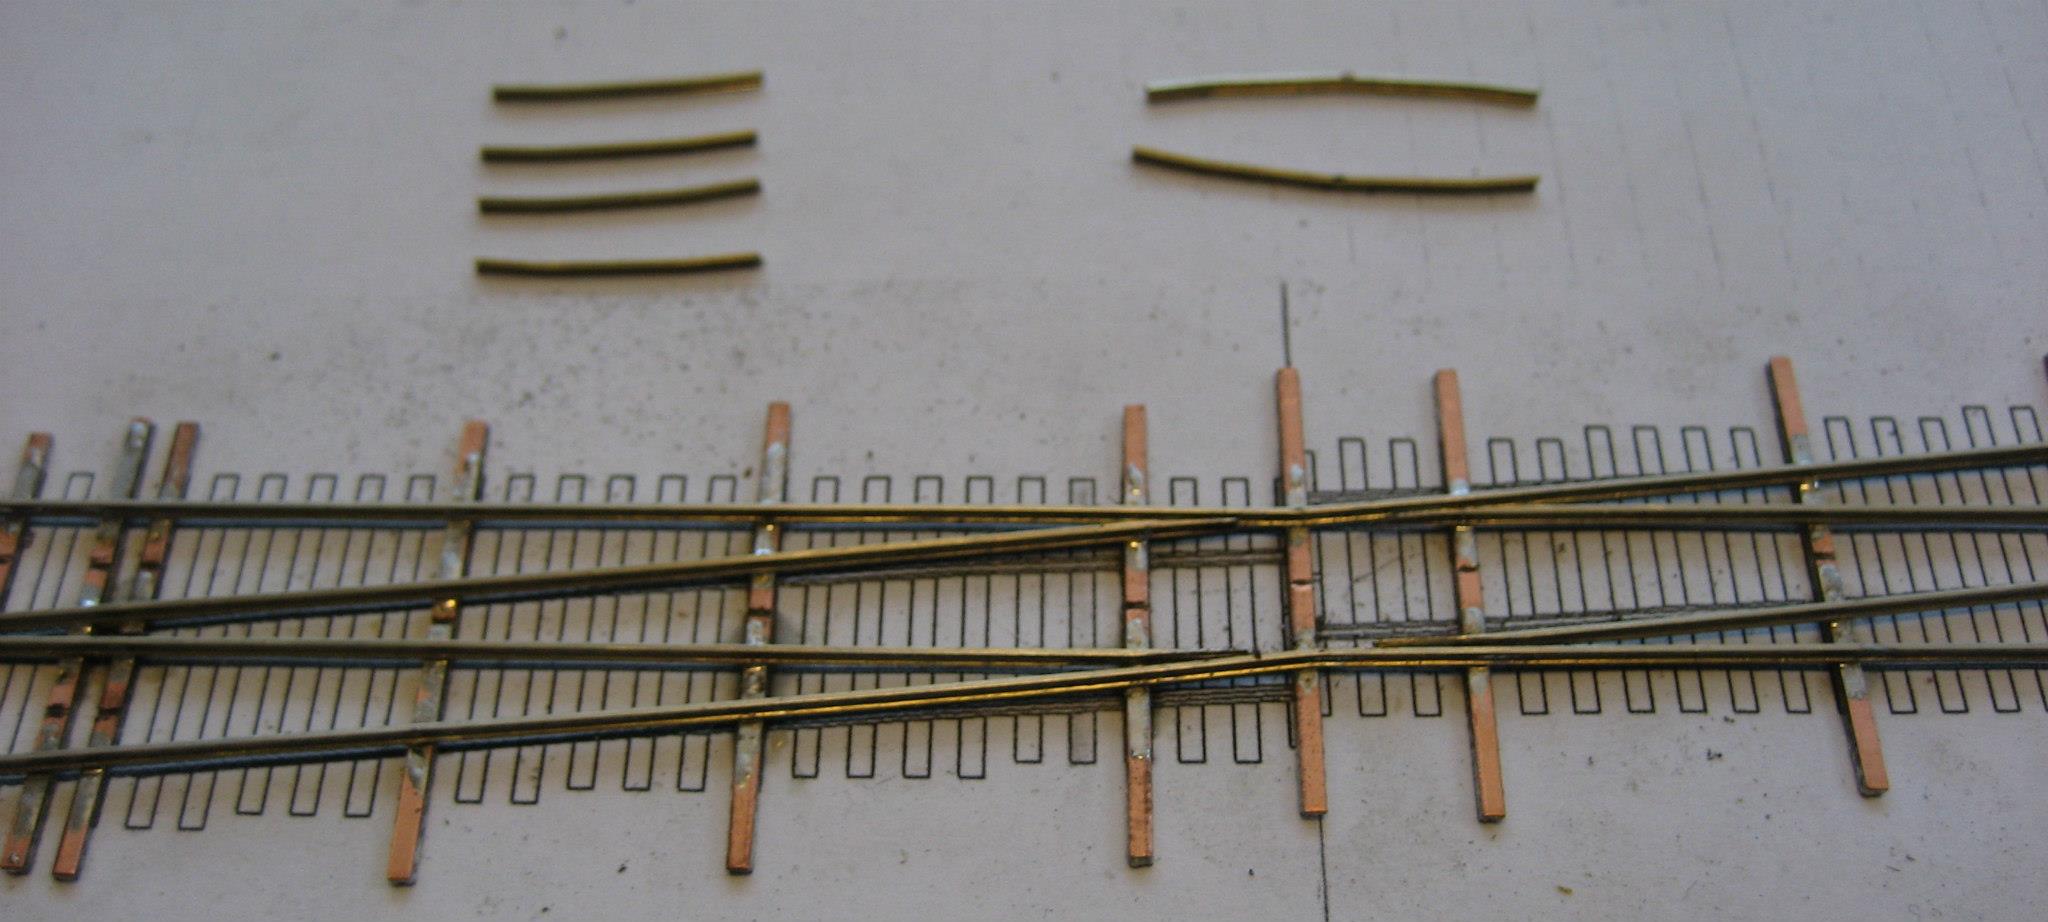
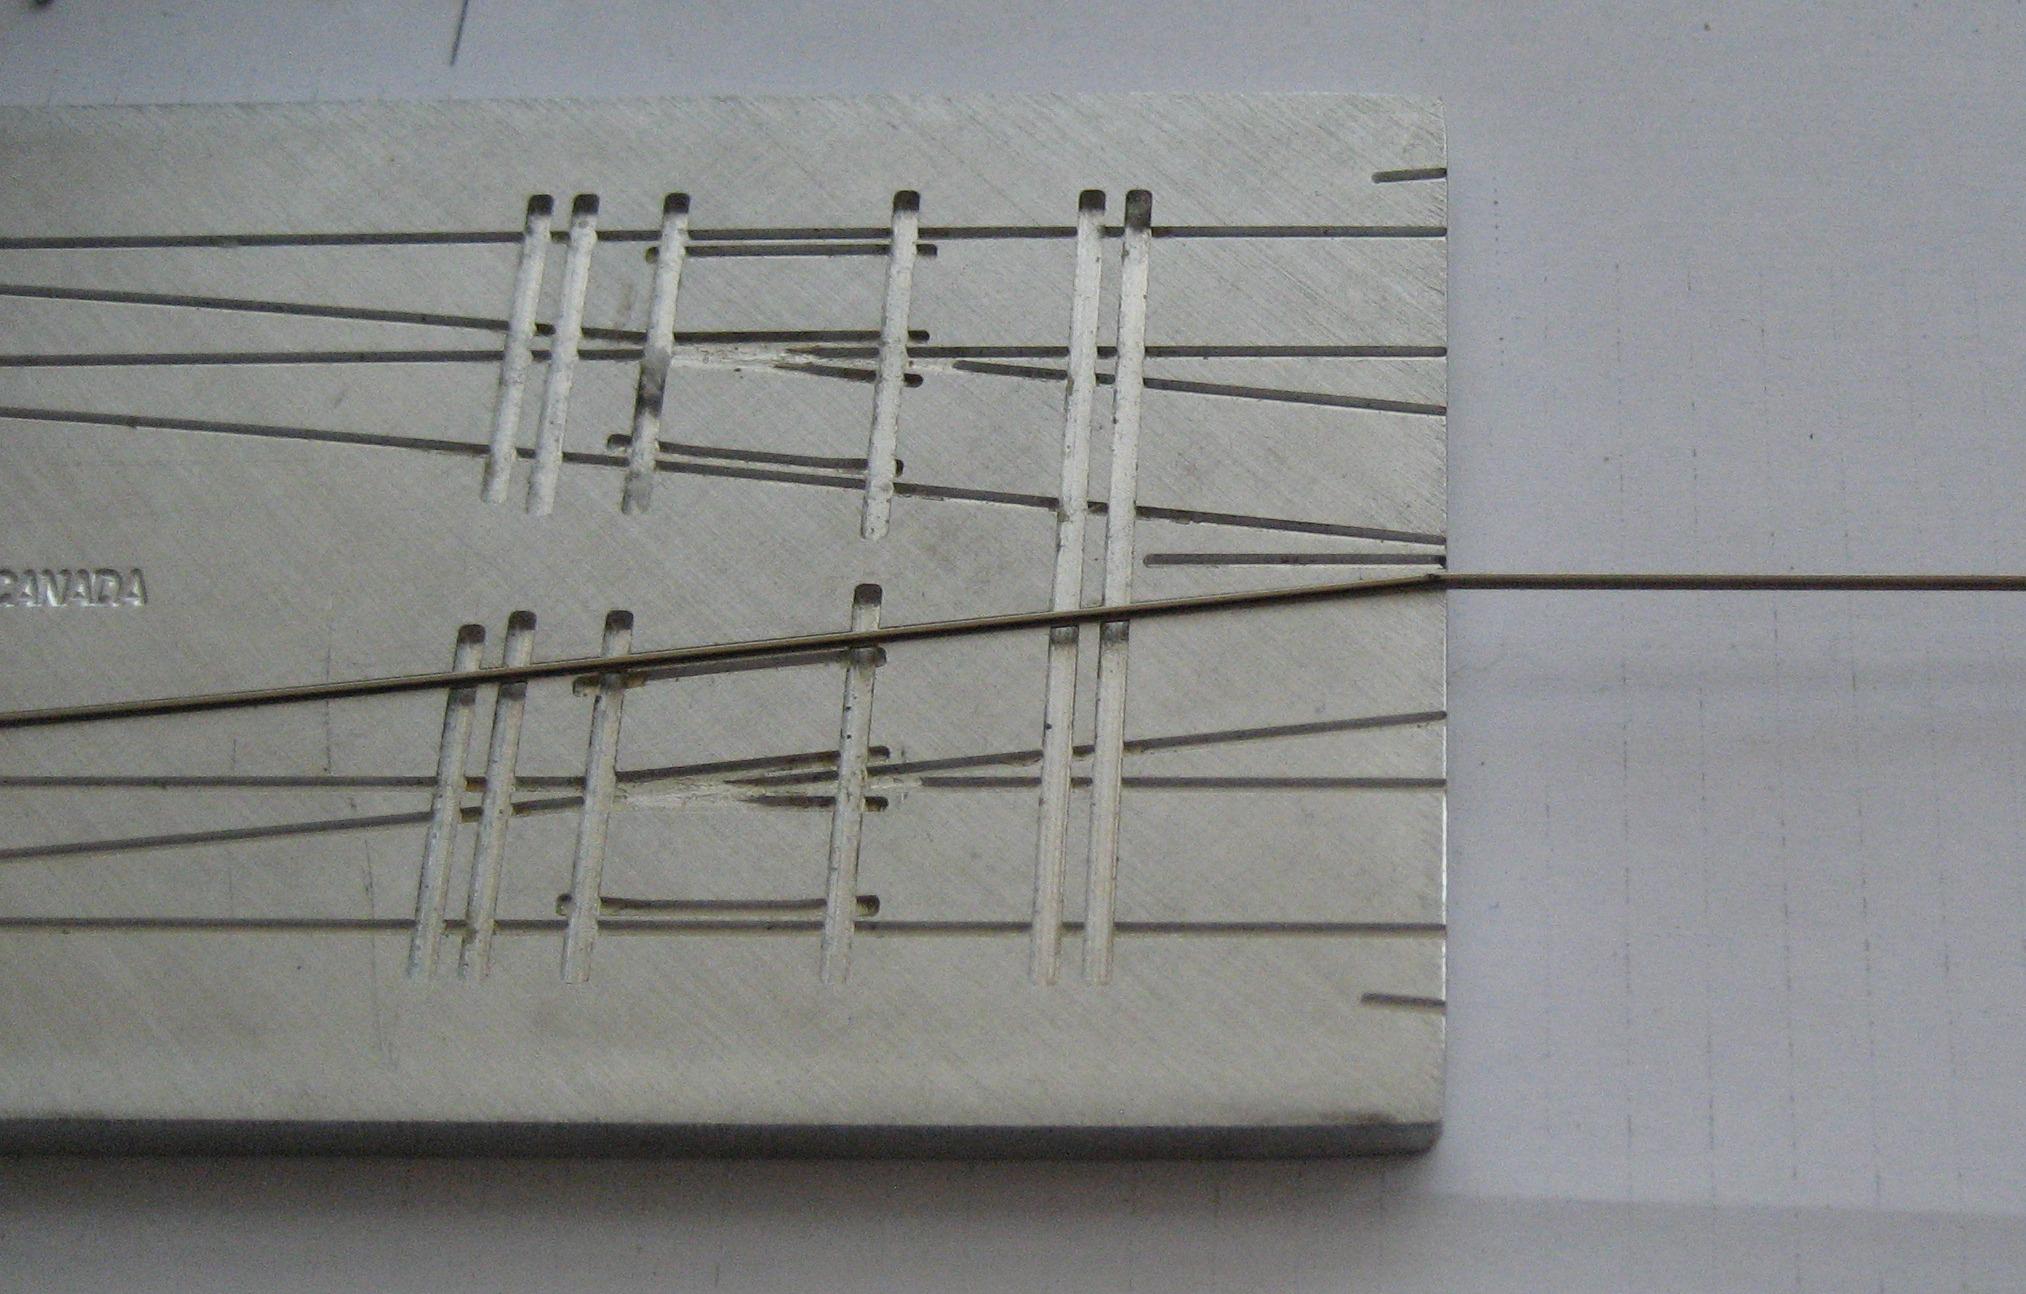
08-I used the 1:9 point jig for the various bends. In the jig it is easier to rightly align the rail. FT advices to remove the feet of the rail. This might be usefull in scale bigger then N, but in N the feet of the rail is 1,2 mm wide, so I have found no need for thinning the railfoot
Image
09-Detailed shoot of the bend rail

Image
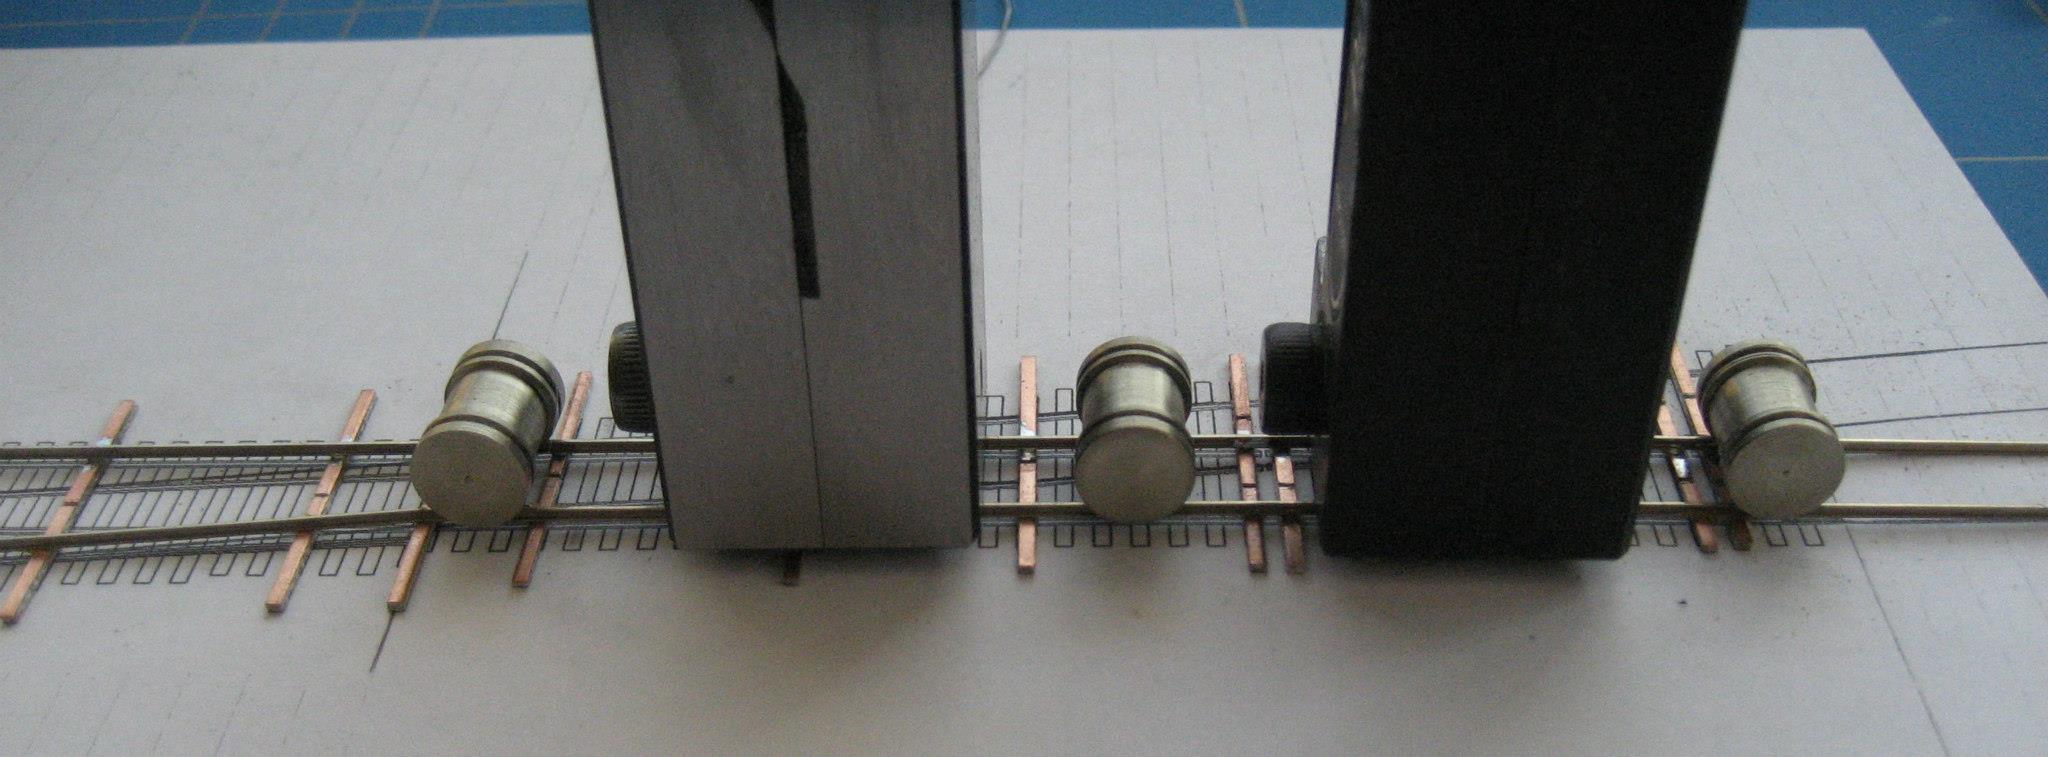
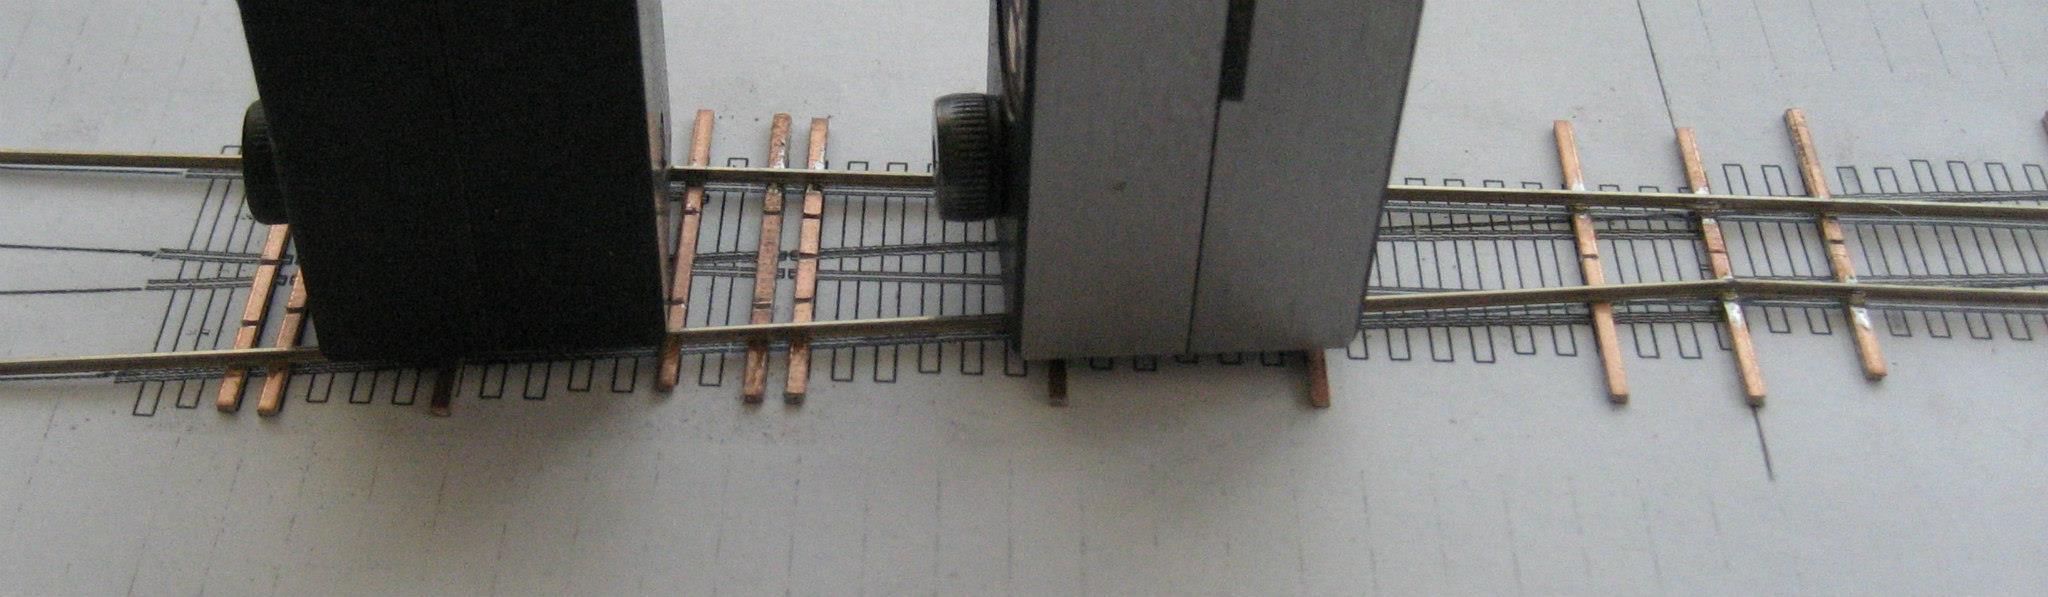
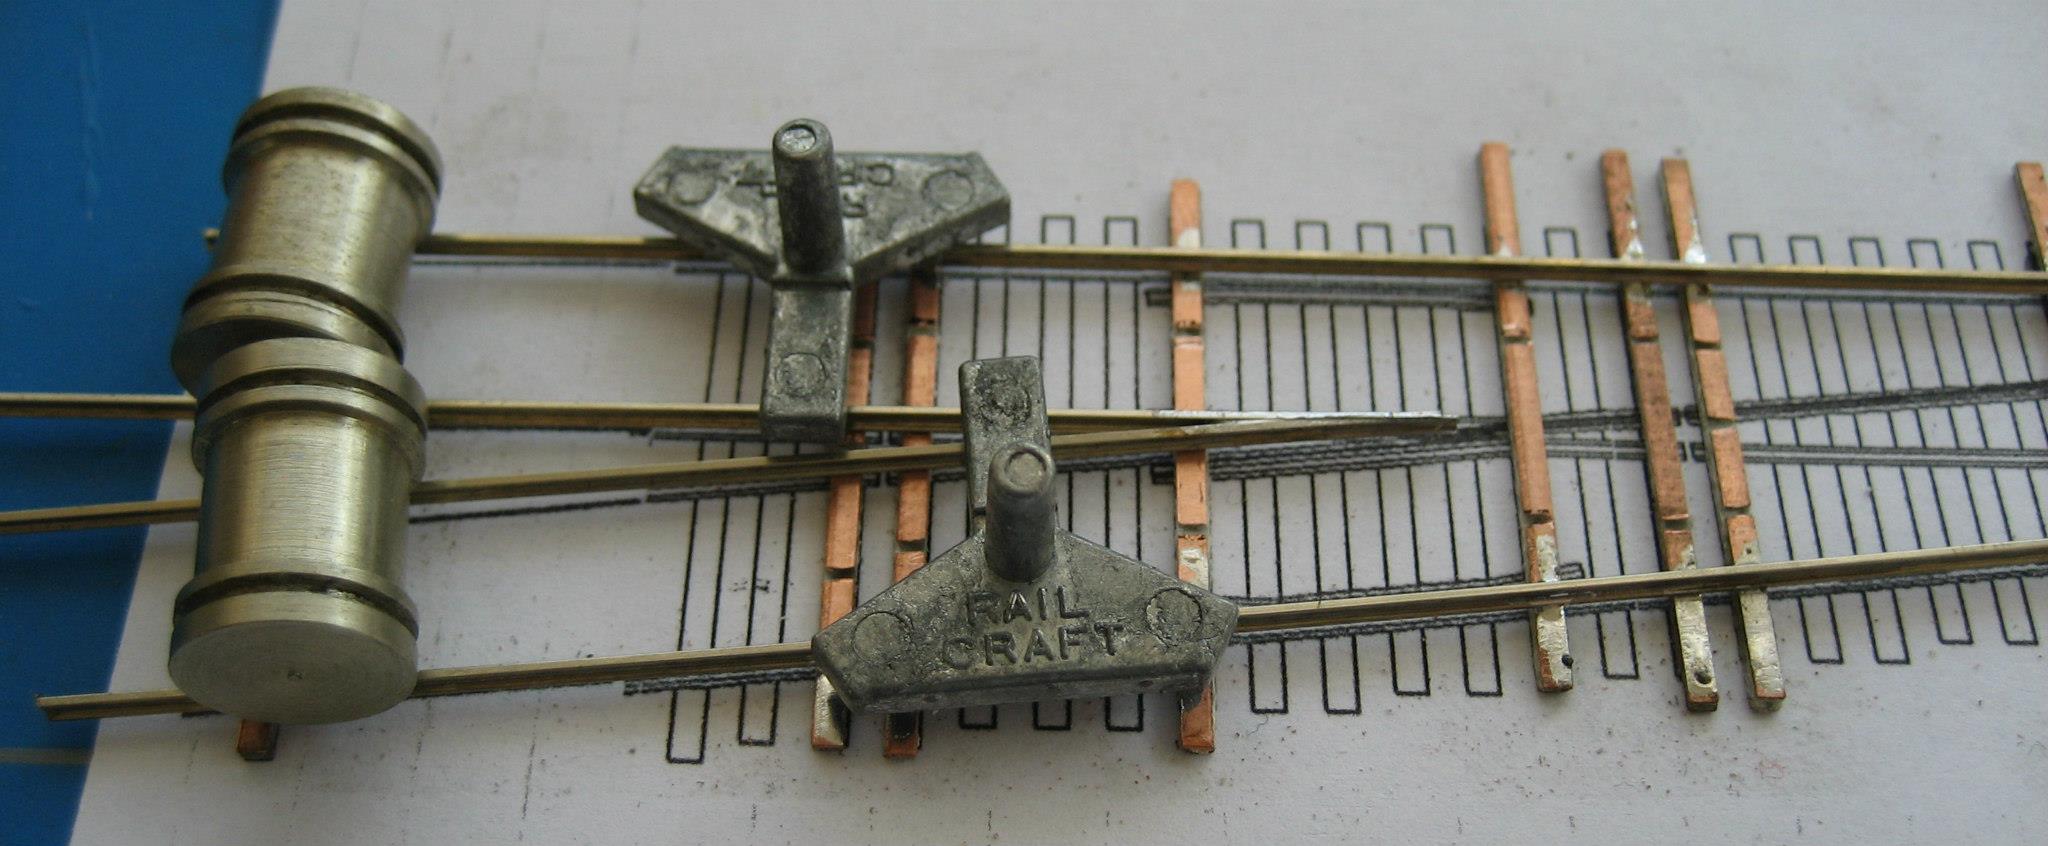
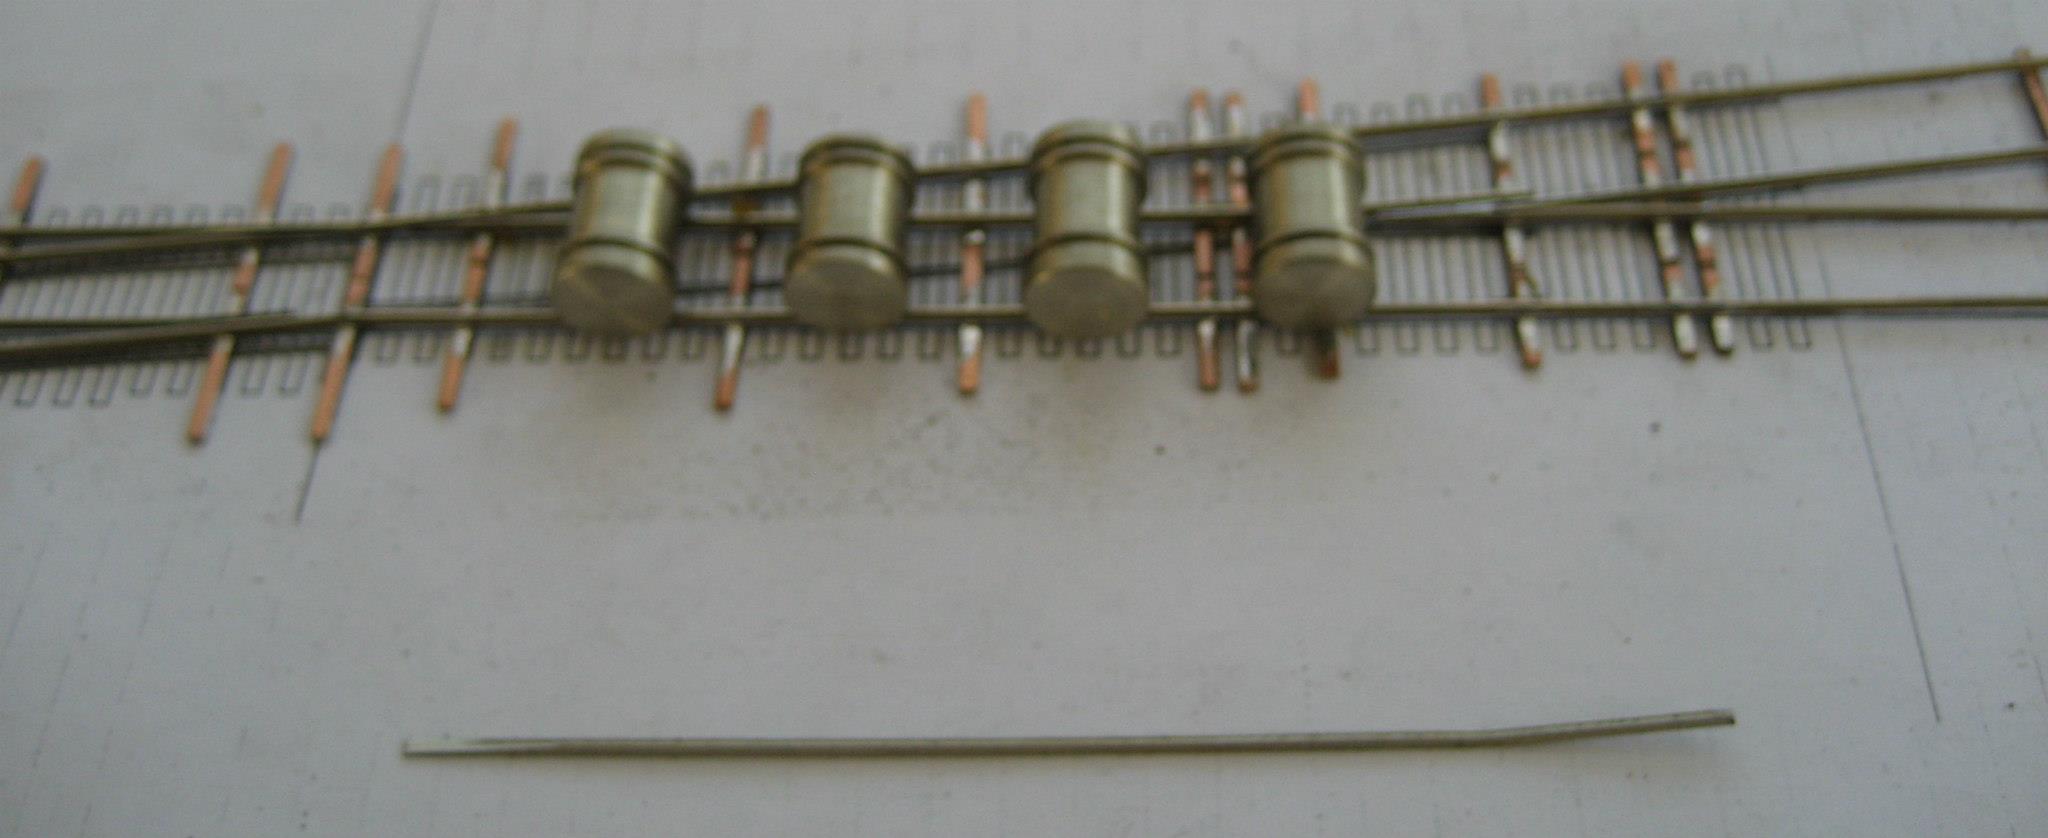
10-Everything kept in place with various jigs. The FastTrack filing aids are great for weighing down :)

_________________
Paul Bender

Everybody can shovel, firing is an art

📷 Image no longer available
Originally hosted at i279.photobucket.com — the host went away before this archive was made.

Firing this train was more fun then hard labor :-) © R. de Water


Top
 Profile  
 
PostPosted: Mon Feb 18, 2013 7:37 am 
Offline
User avatar

Joined: Sun Sep 19, 2010 6:05 am
Posts: 51
Location: Rotterdam
Image
11-The first (straight) rail on its final place

Image
12-The crossing rail on its place

Image
13-Not the best picture but building is more important / fun then taking pictures. The first frog

Image
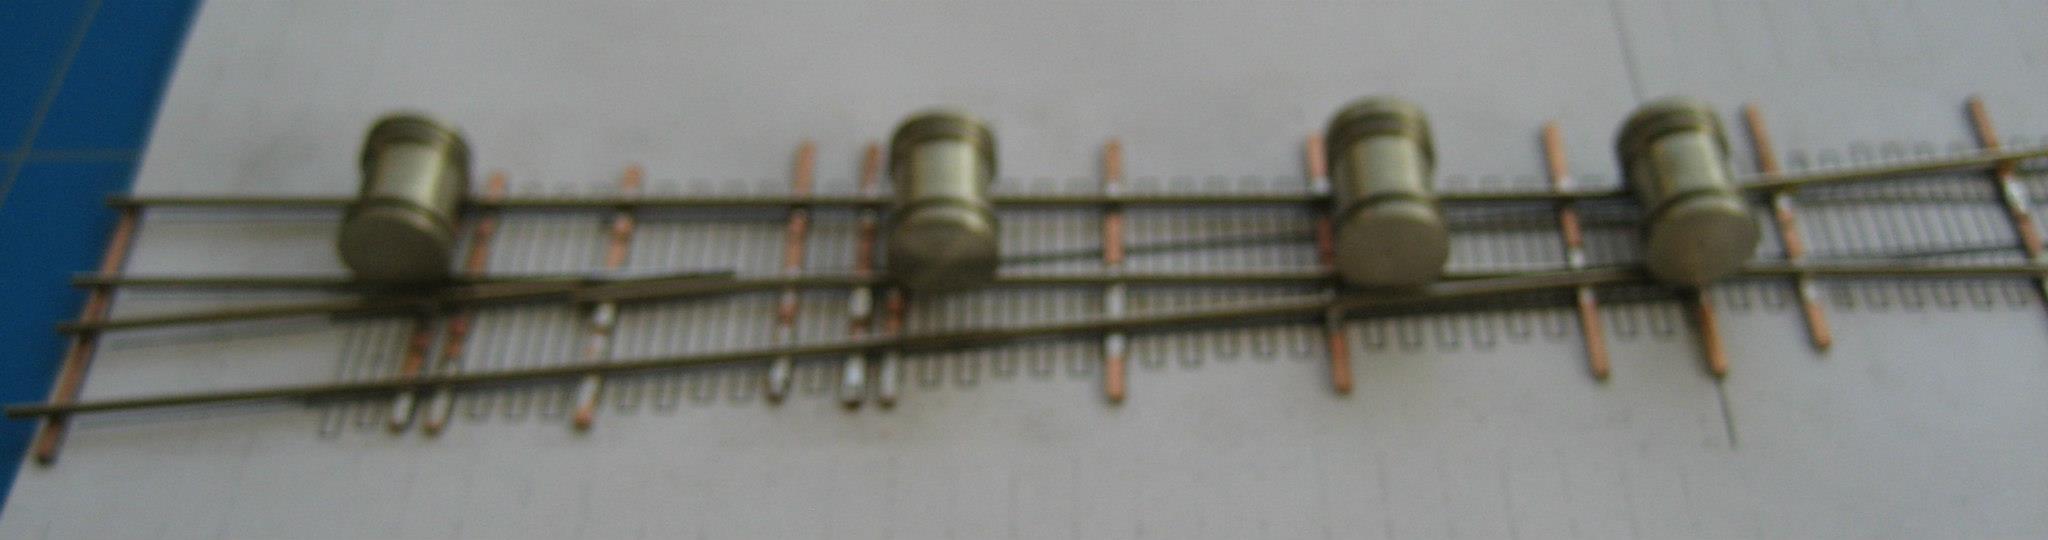
14-The various bits kept in place with various jigs

📷 Image no longer available
Originally hosted at fbcdn-sphotos-b-a.akamaihd.net — the host went away before this archive was made.

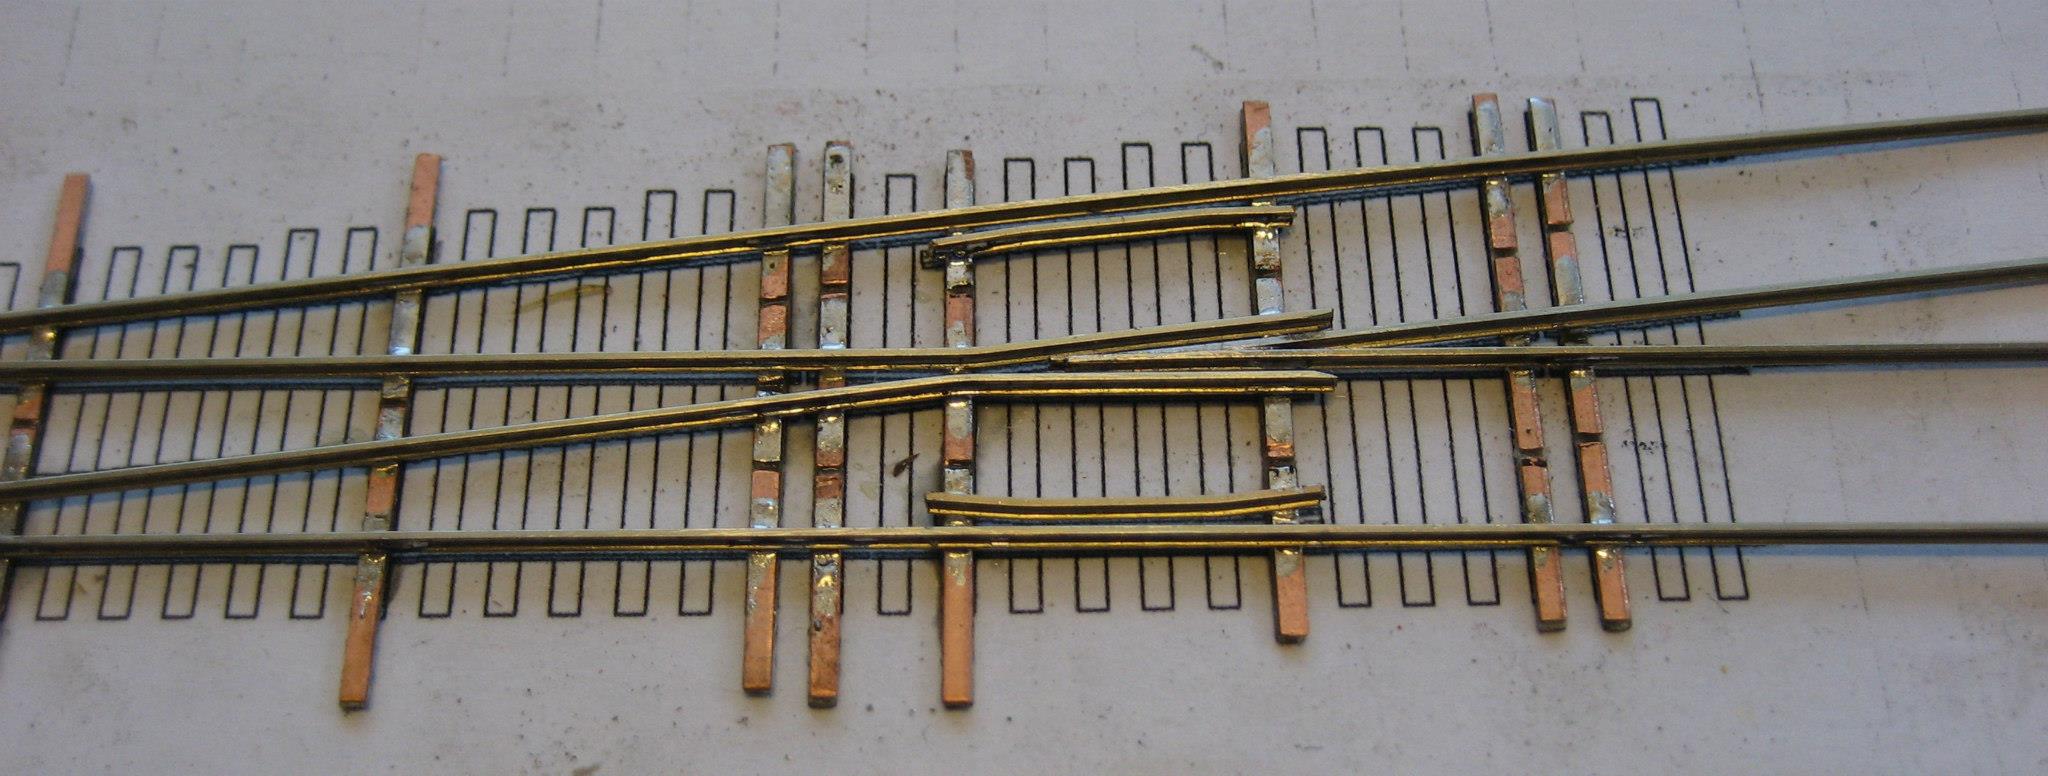
15-Stage 1 done. The frog can assist in putting the toprail in its final position after removing

📷 Image no longer available
Originally hosted at fbcdn-sphotos-e-a.akamaihd.net — the host went away before this archive was made.

16-The first inner rail in its place with jigs

Image
17-And fixed in position

Image
18-The toprail taken out, it has performed its function.

Image
19-Again not the best picture, but the bend toprail and kept in position with jigs

Image
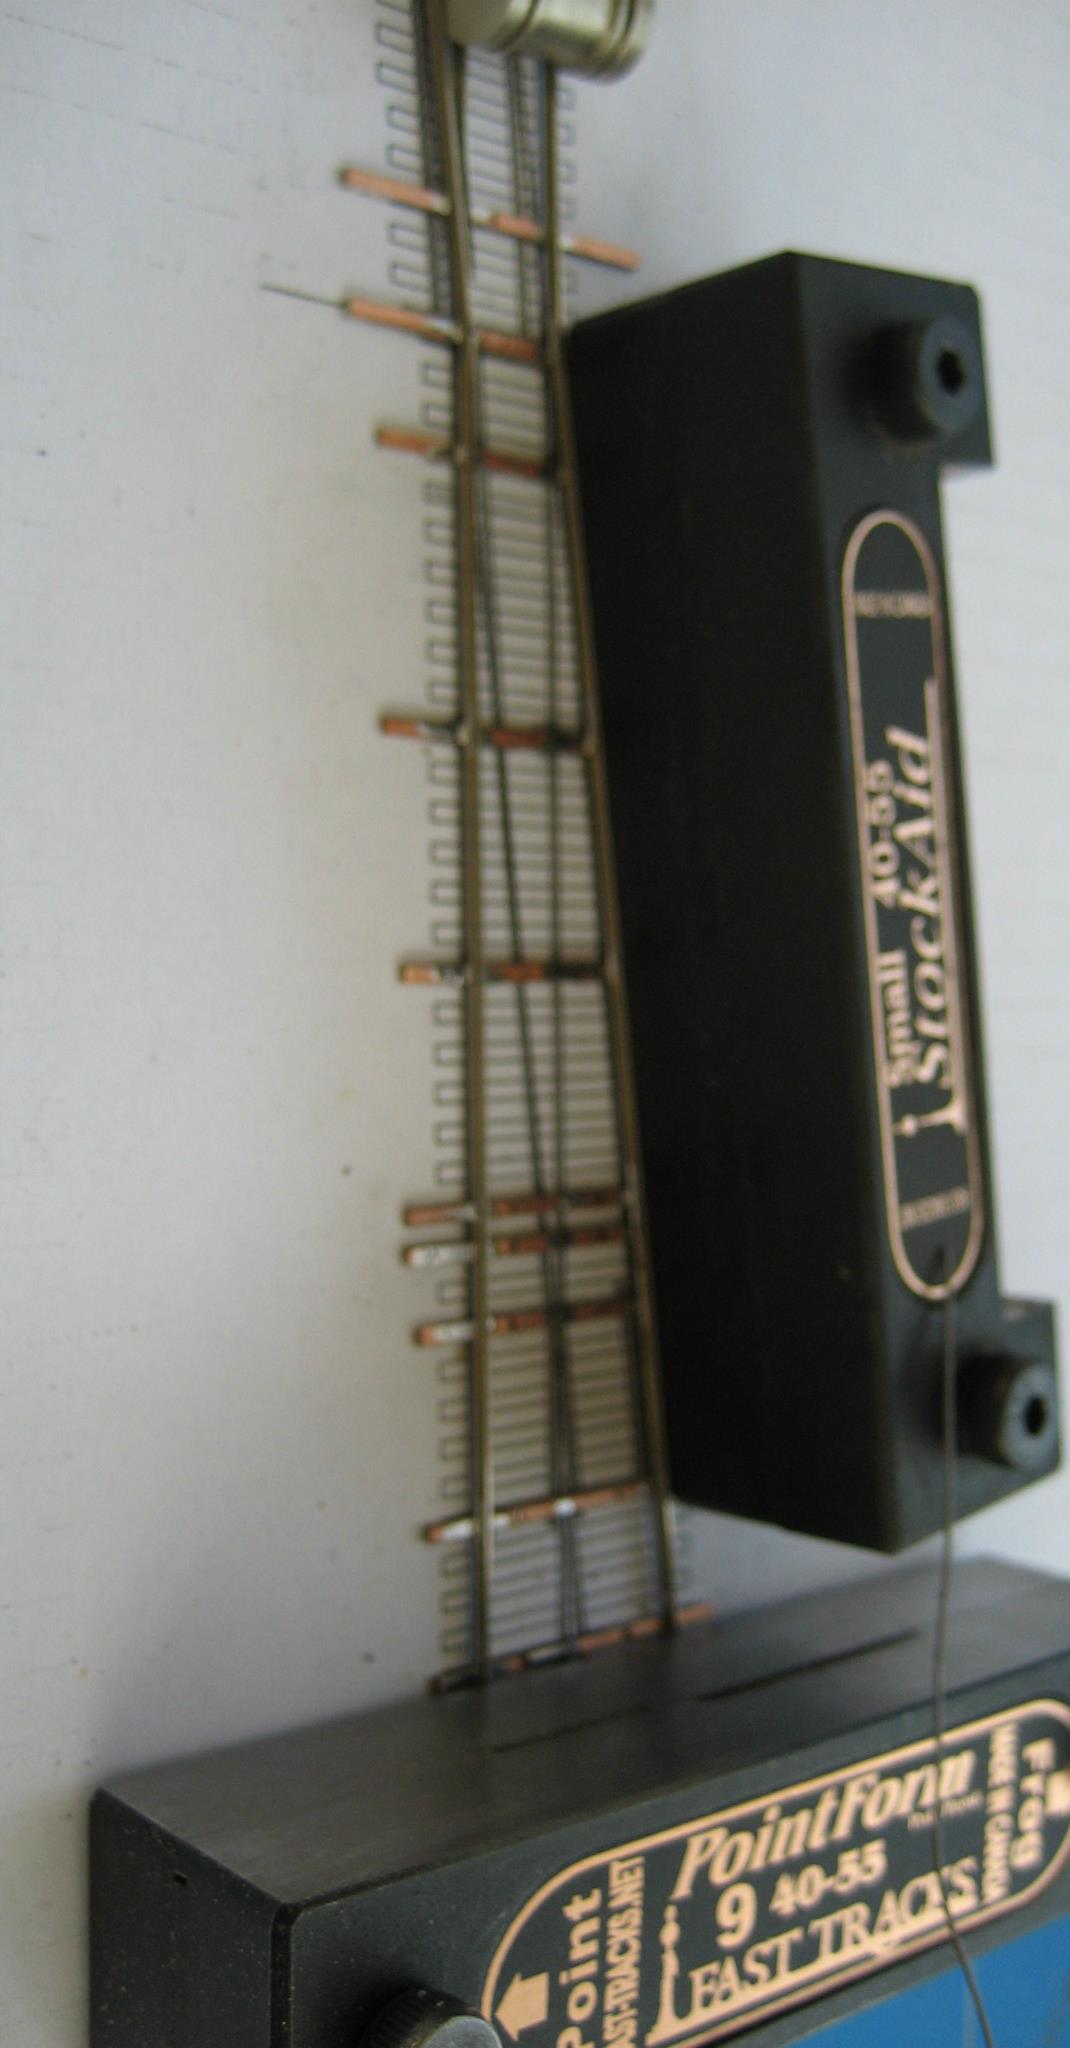
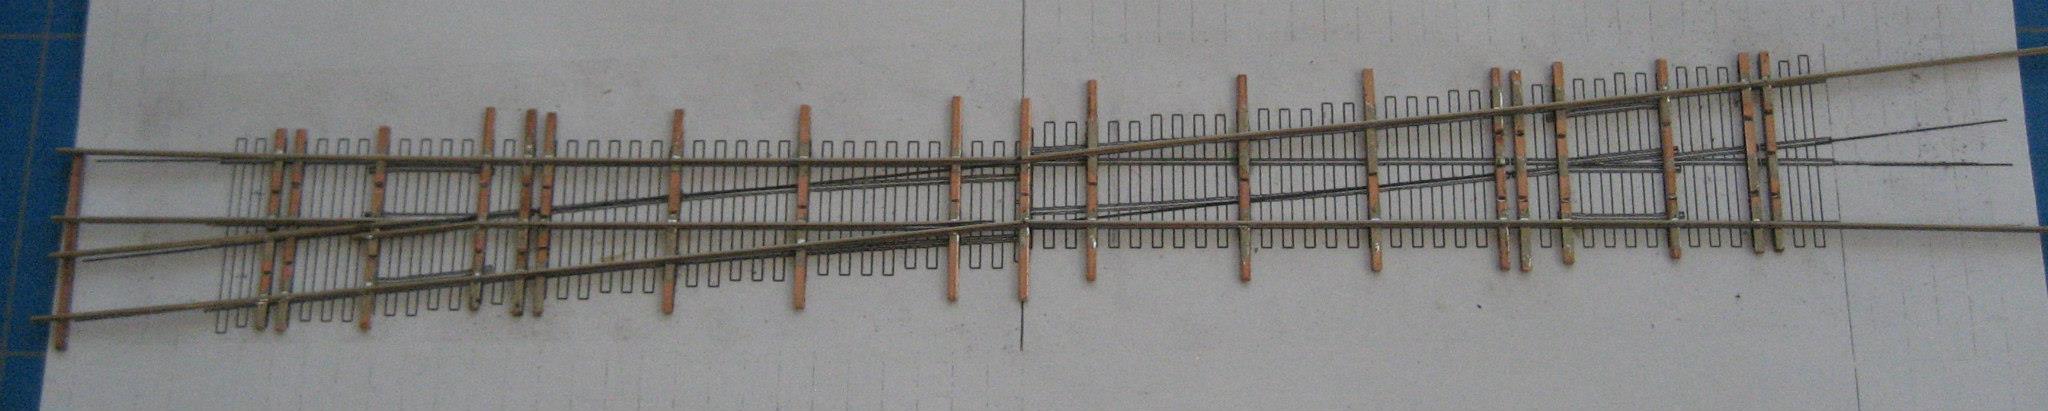
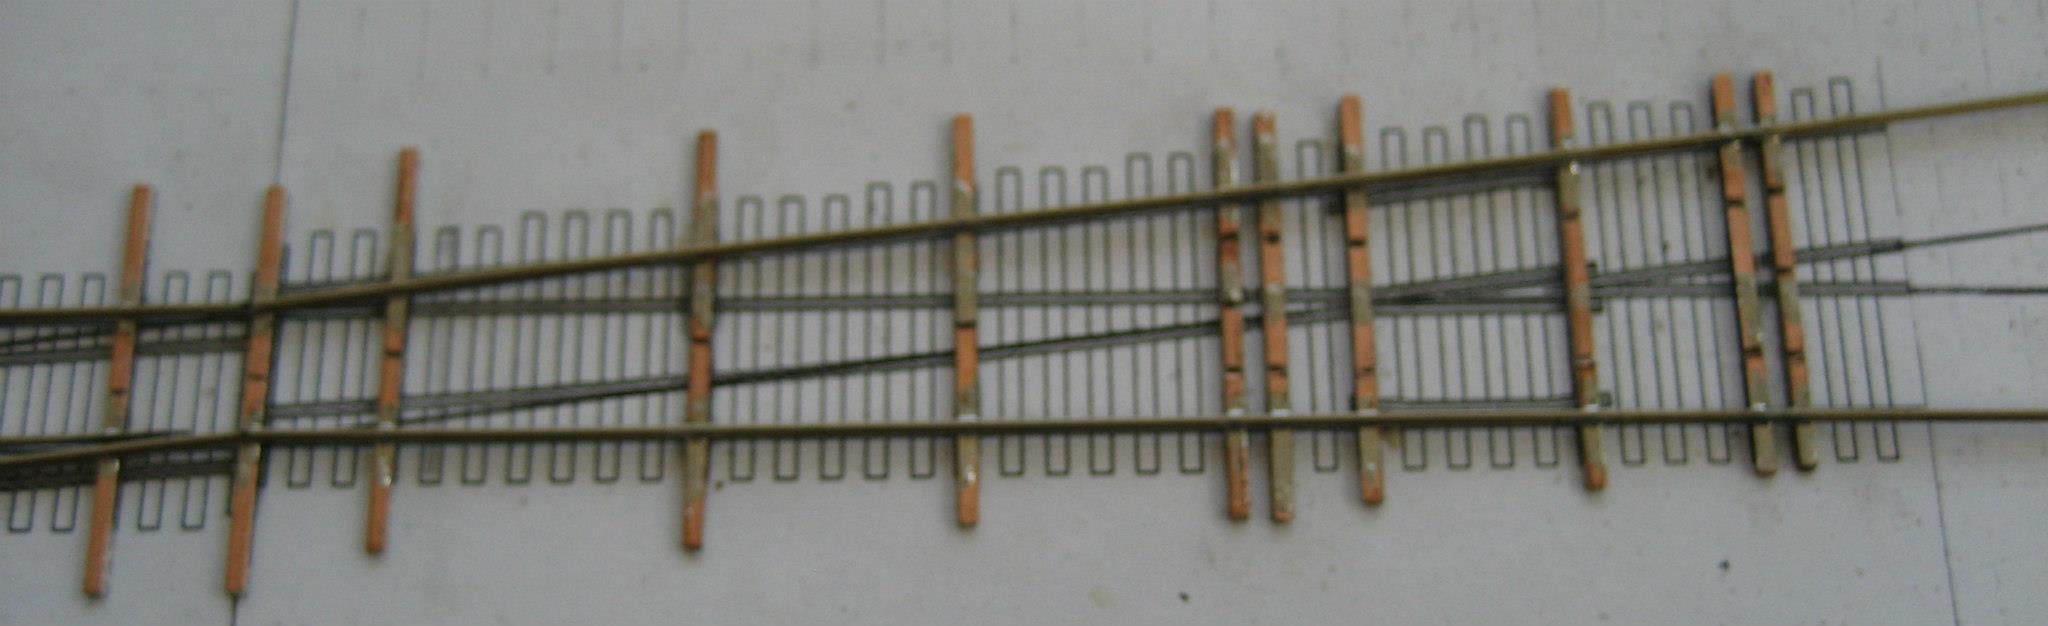
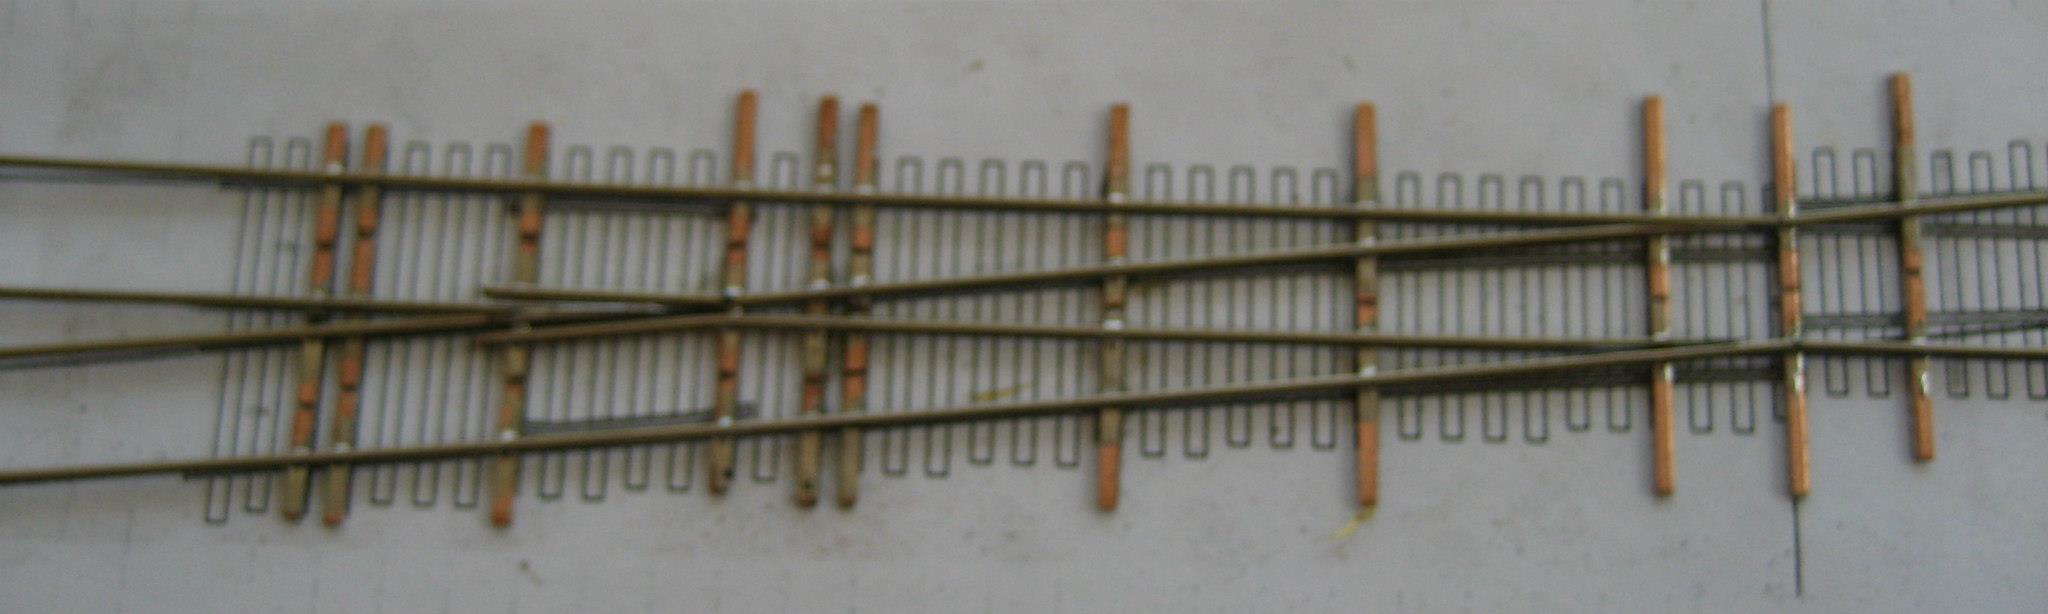
20-Thanks to Facebook for turning this picture :? but you can see the intention. The "Stock-aid" performs as a jig for keeping the crossing rail straight during soldering
_________________
Paul Bender

Everybody can shovel, firing is an art

📷 Image no longer available
Originally hosted at i279.photobucket.com — the host went away before this archive was made.

Firing this train was more fun then hard labor :-) © R. de Water


Last edited by P Bender on Mon Feb 18, 2013 1:06 pm, edited 1 time in total.

Top
 Profile  
 
PostPosted: Mon Feb 18, 2013 1:05 pm 
Offline
User avatar

Joined: Sun Sep 19, 2010 6:05 am
Posts: 51
Location: Rotterdam
Image
21-Both outer rails of the crossing in place

Image
22-A close up of the top rail

📷 Image no longer available
Originally hosted at fbcdn-sphotos-c-a.akamaihd.net — the host went away before this archive was made.

23-The second (left) innerrail ready for soldering

Image
24-Leftside done (except for the guardrails)

Image
25-Continiuing on the right side

Image
26-The righthand frog ready to be put in place

📷 Image no longer available
Originally hosted at fbcdn-sphotos-c-a.akamaihd.net — the host went away before this archive was made.

27-The various jigs to keep the frograil in place

📷 Image no longer available
Originally hosted at fbcdn-sphotos-d-a.akamaihd.net — the host went away before this archive was made.

28-With this as result

📷 Image no longer available
Originally hosted at fbcdn-sphotos-a-a.akamaihd.net — the host went away before this archive was made.

29-The righthand inner rails

Image
30-The first rail in place

_________________
Paul Bender

Everybody can shovel, firing is an art

📷 Image no longer available
Originally hosted at i279.photobucket.com — the host went away before this archive was made.

Firing this train was more fun then hard labor :-) © R. de Water


Top
 Profile  
 
PostPosted: Mon Feb 18, 2013 1:12 pm 
Offline
User avatar

Joined: Sun Sep 19, 2010 6:05 am
Posts: 51
Location: Rotterdam
Image
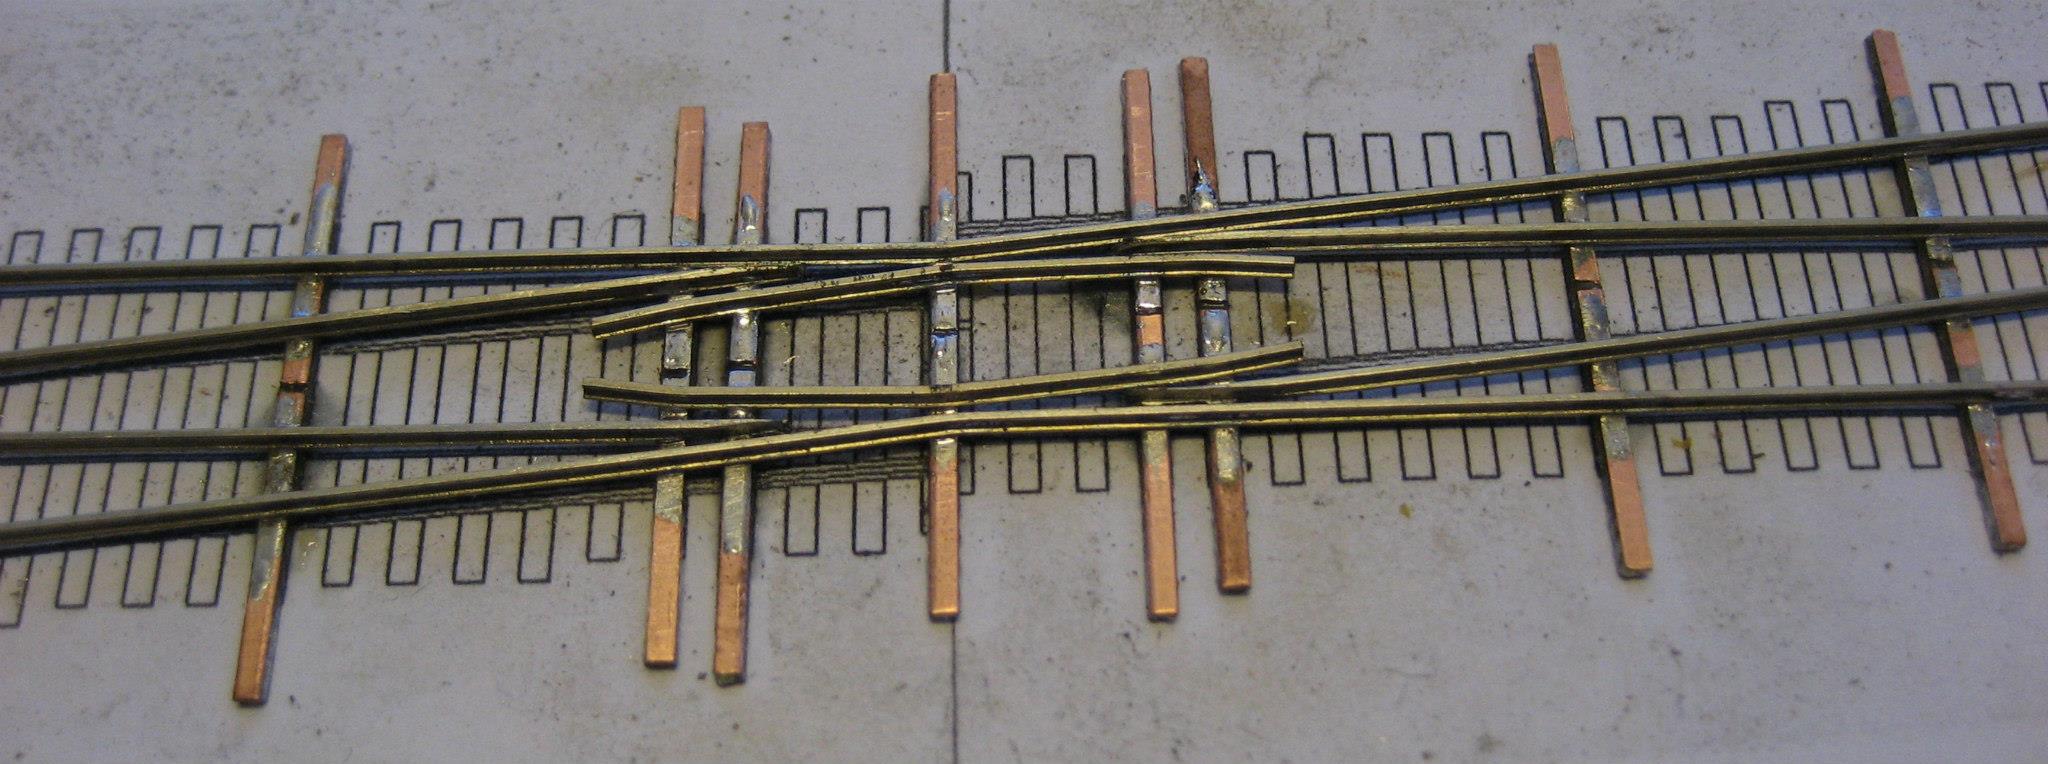
31-Again thanks to FB for turning this picture, but the righthandside is done as well

Image
32-the first try to get the flange opening to the required width. From the 1:6 half slip I know that was not likely to going to work. However for minimal alteration this is an easy way of getting the required width. The blades of a junior saw are just 0.7 mm over the teeth or exactly the required NMRA width for N-scale

Image
33-All guardrails prepared

Image
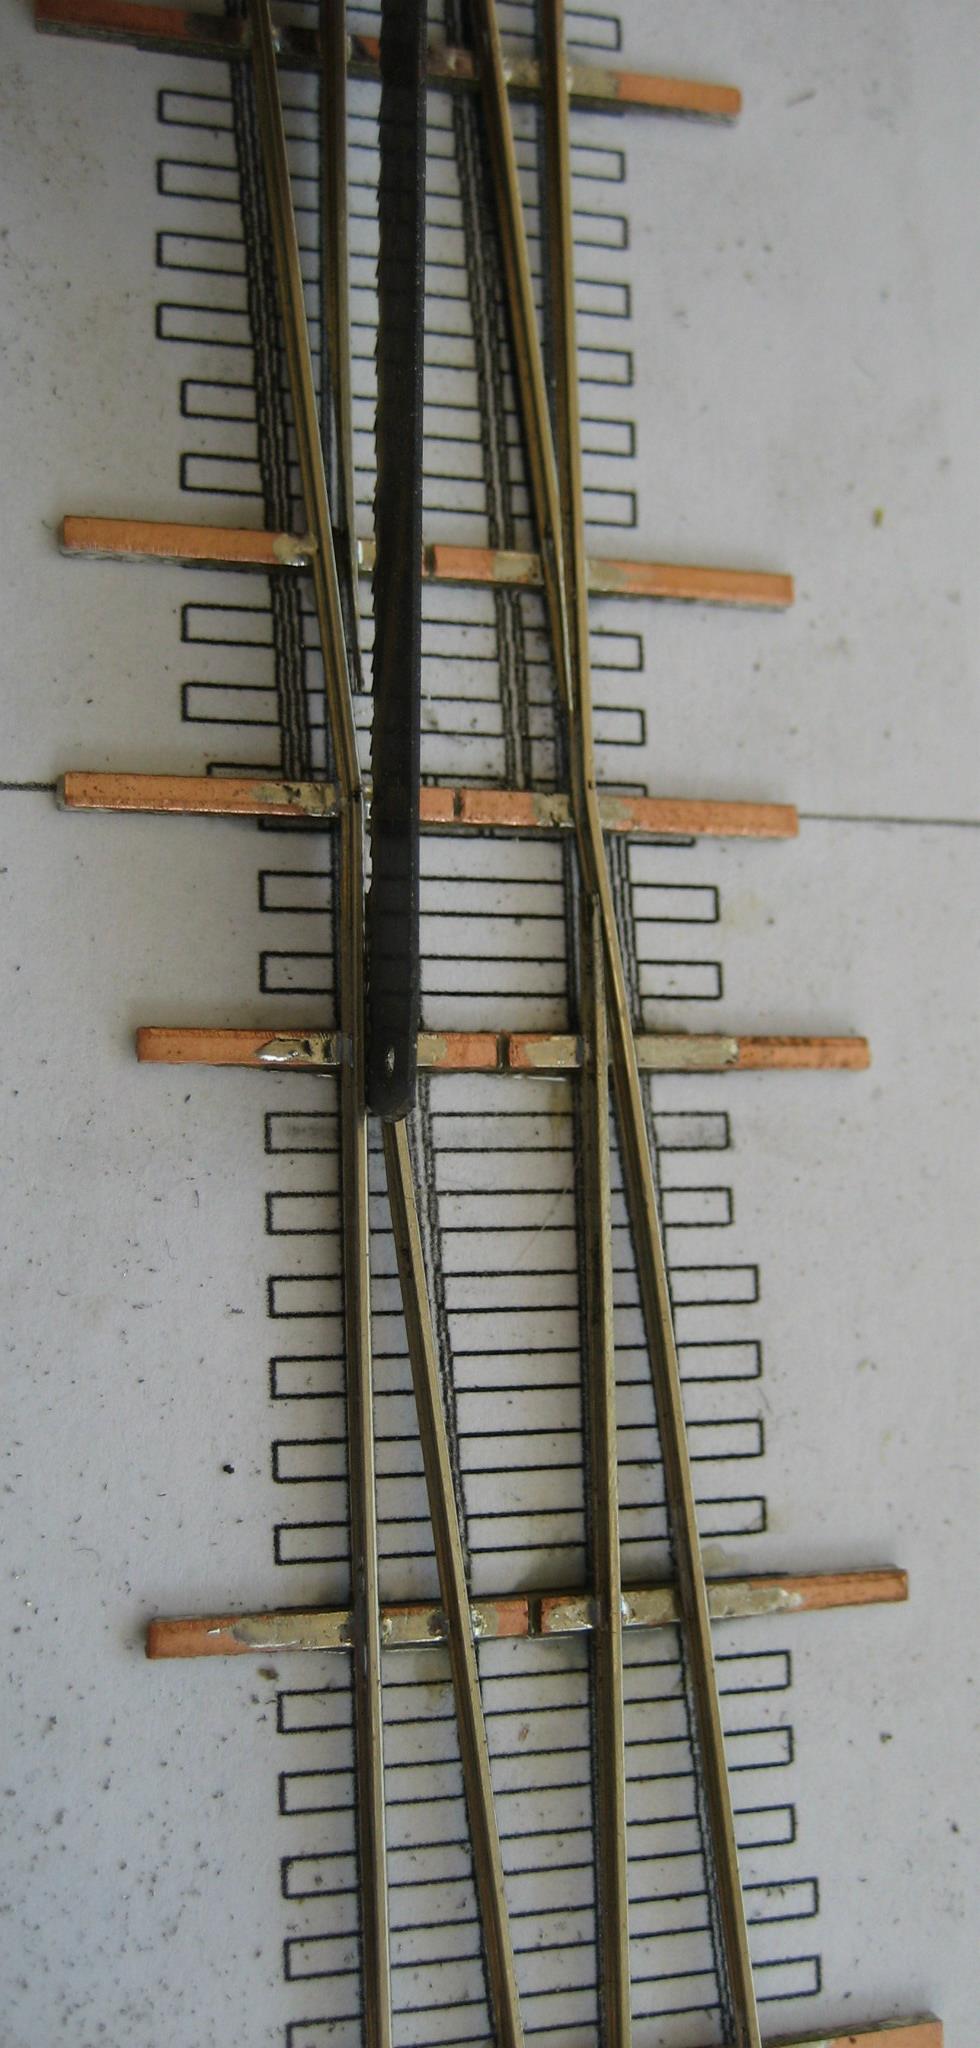
34-Lefthand guardrails in place. Oops, I have beveled the guardrail on the frog the wrong way around :oops:

Image
35-Righthand guardrails in place

Image
36-Center guardrails in place

Image
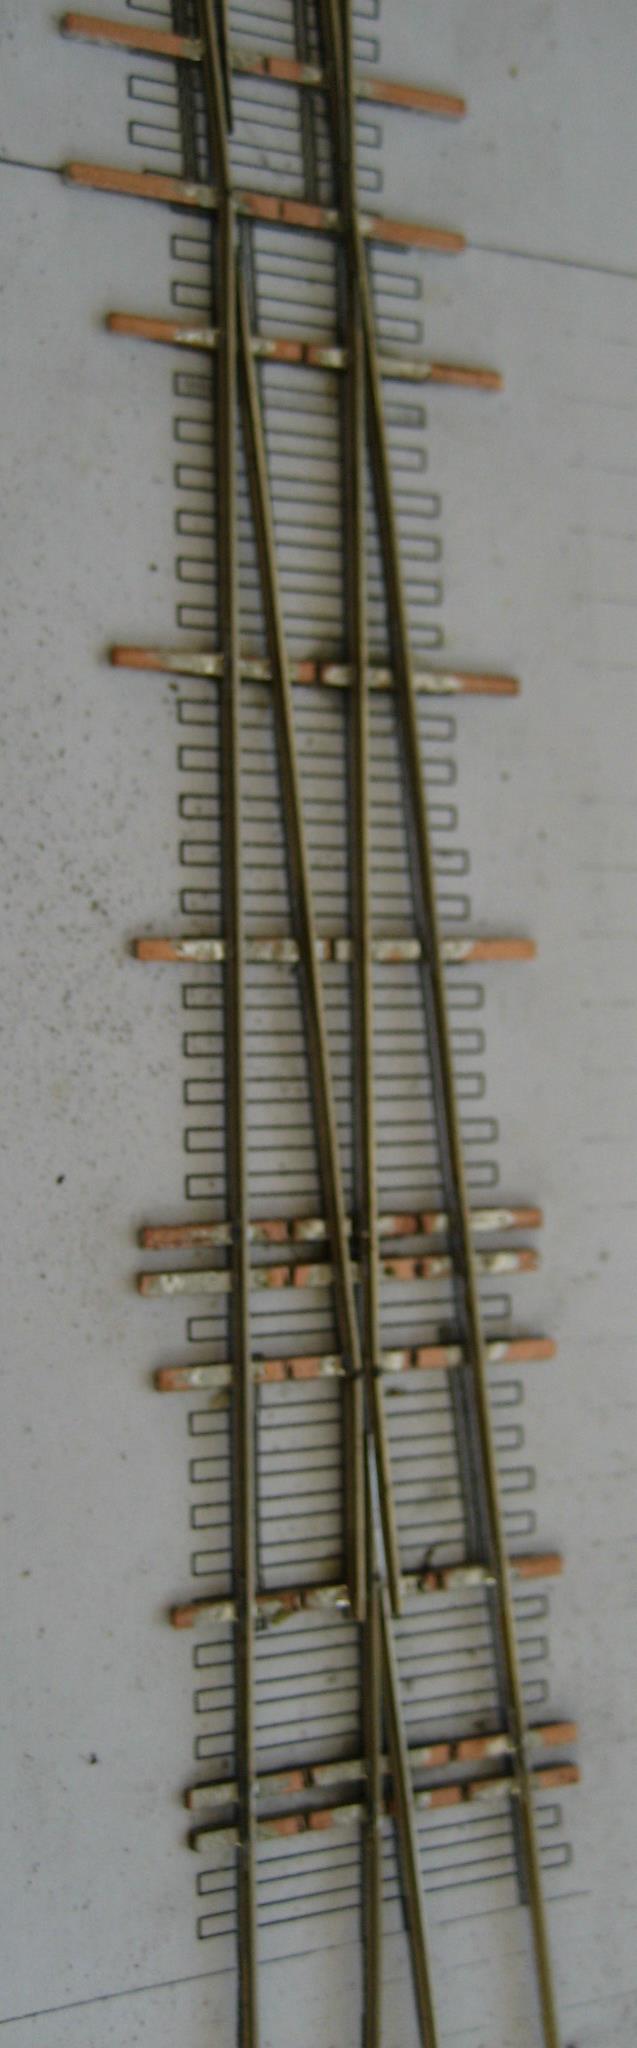
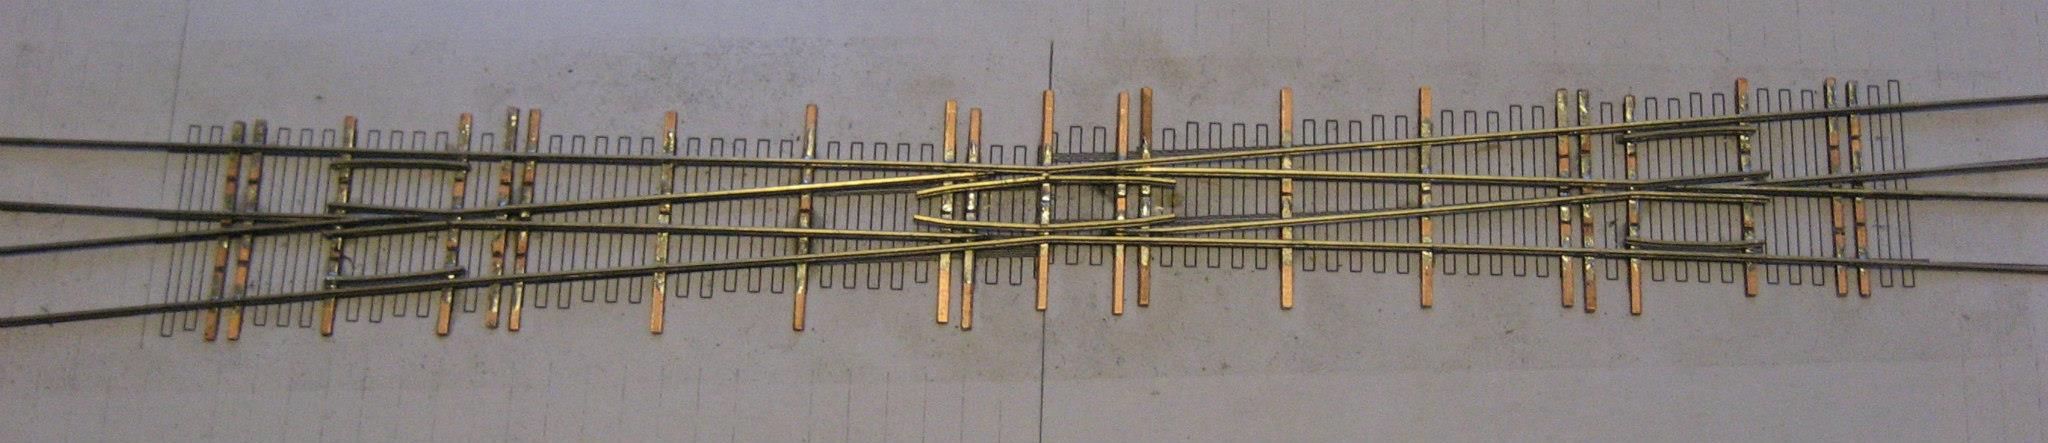
37-And the crossing is almost done, or at least can be taken from the template

Image
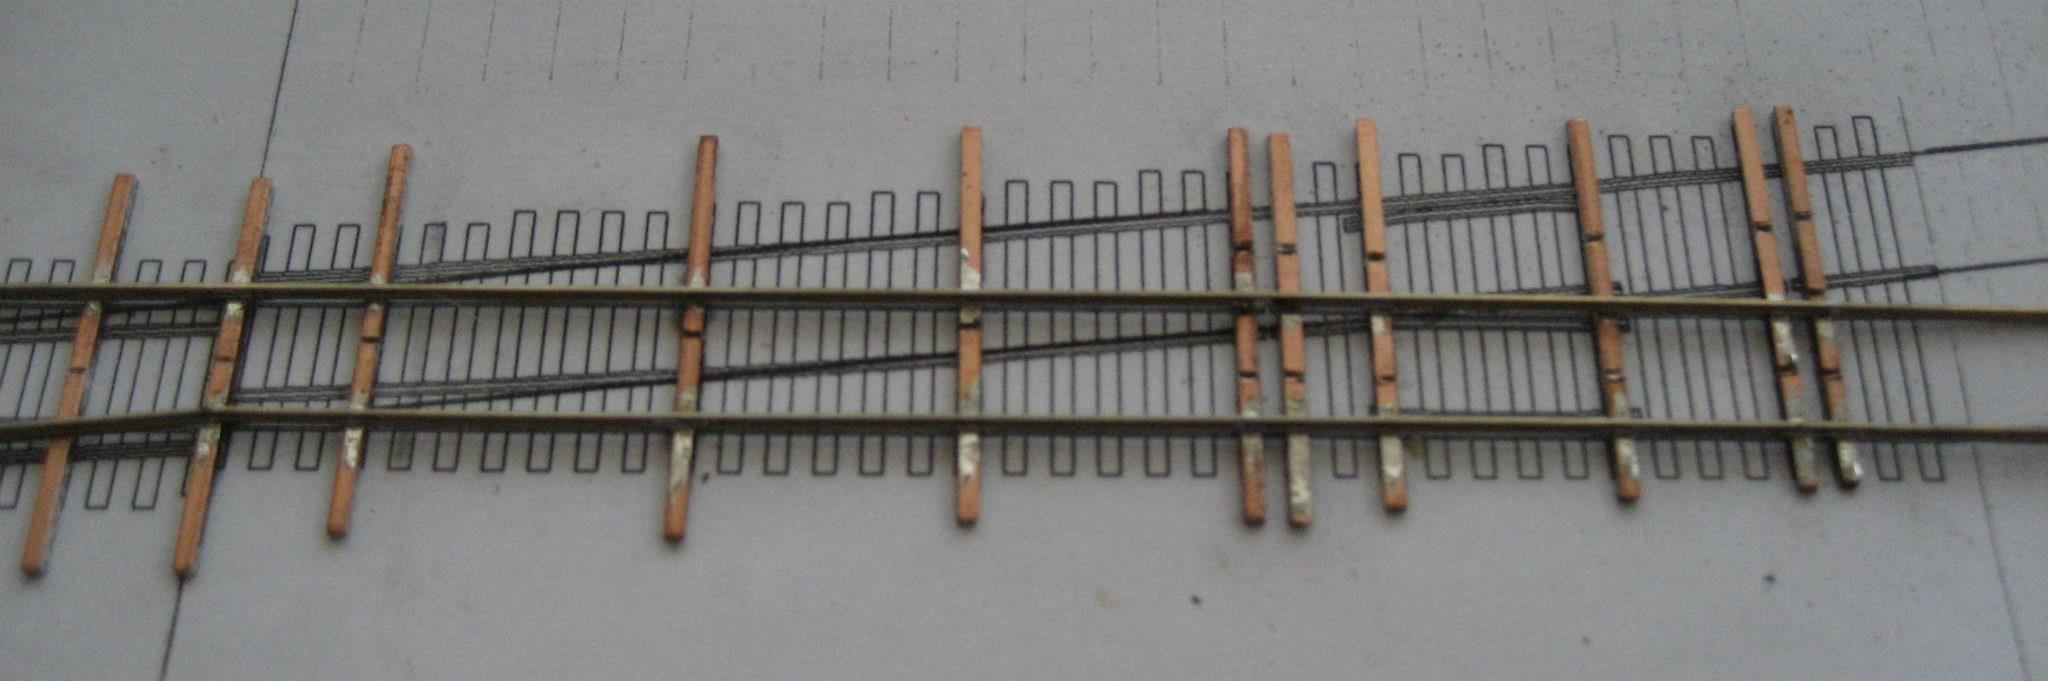
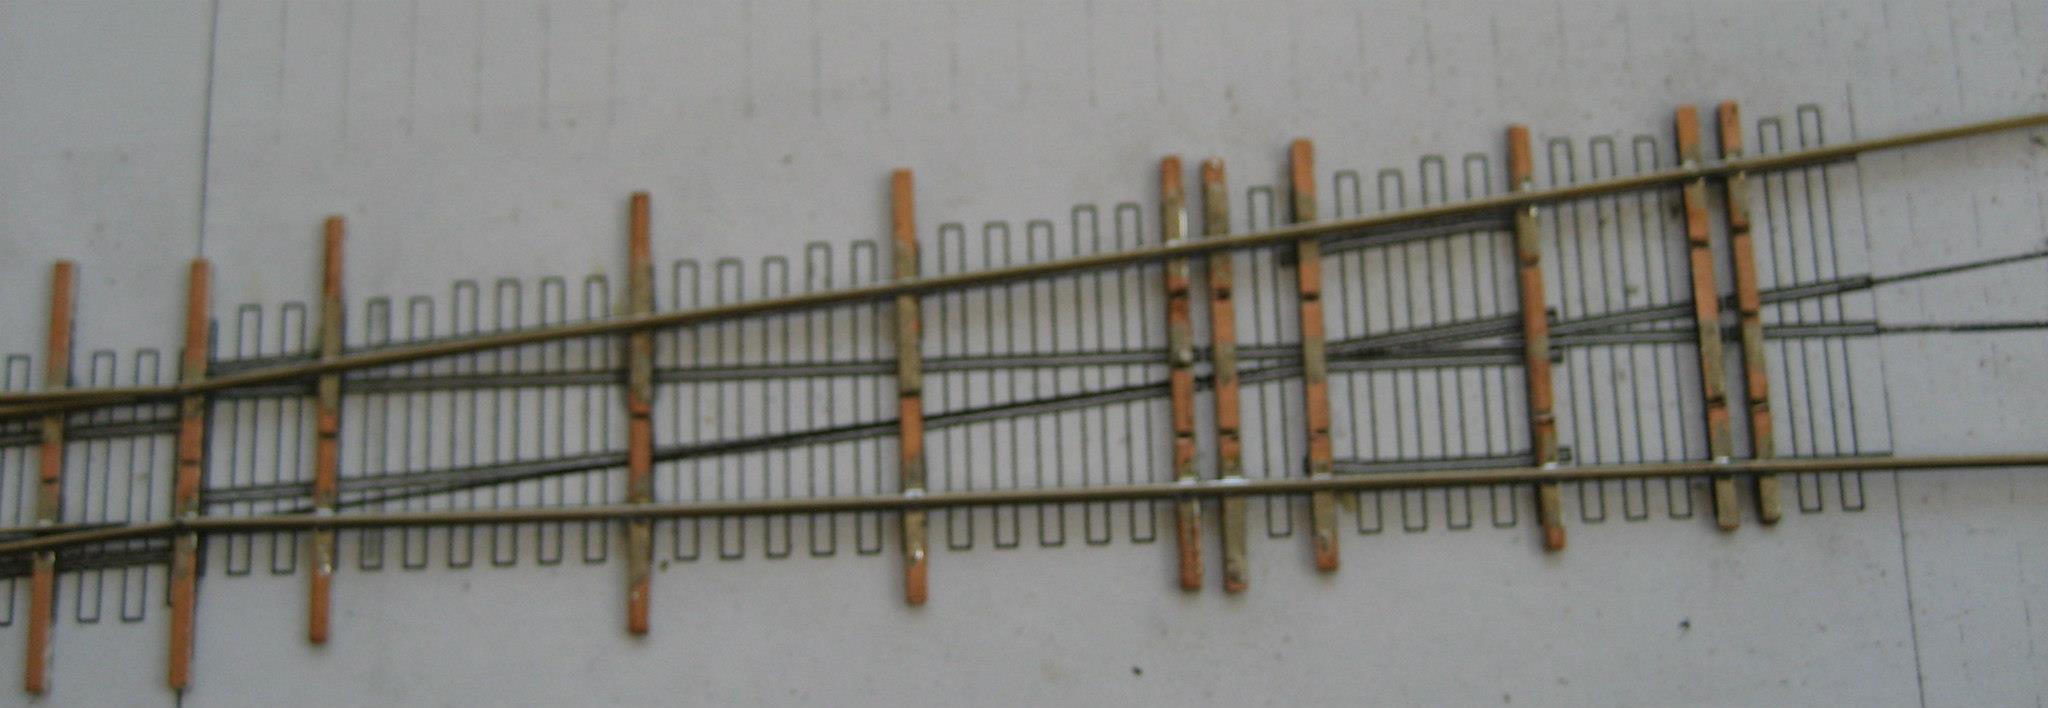
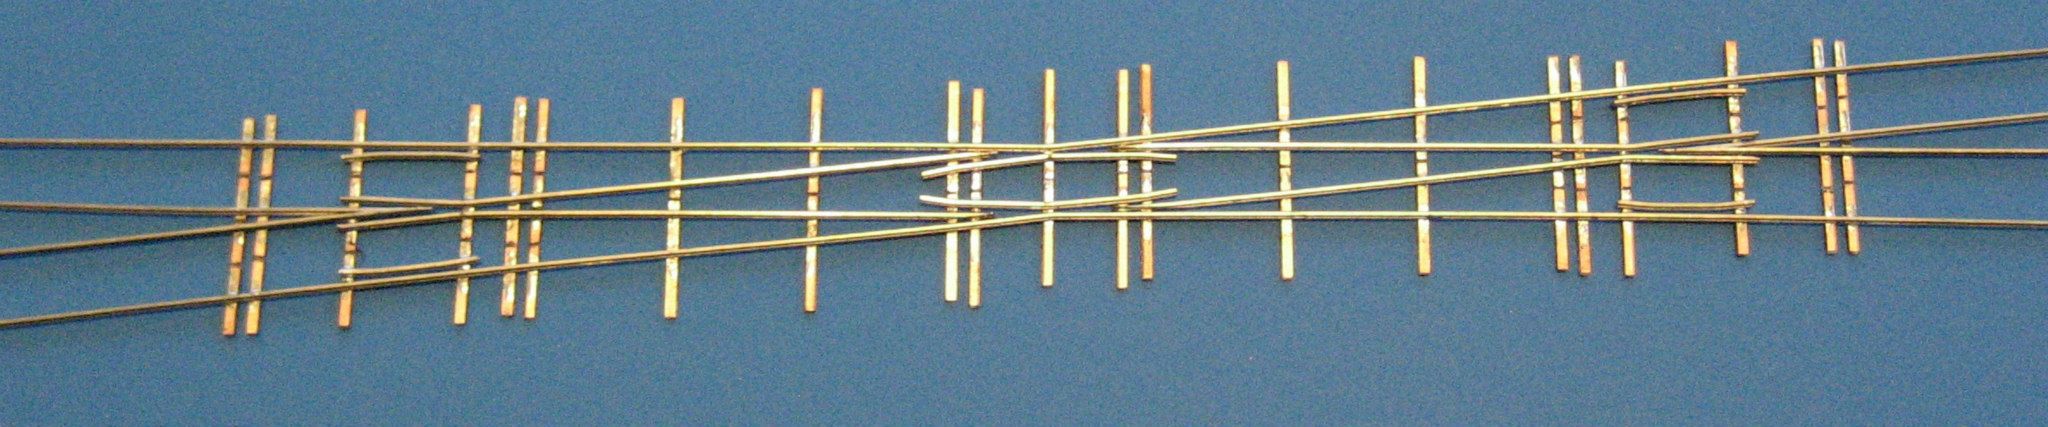
38-The crossing taken from the template. This is very simple with the 3M "Post-it" sprayed on the template. The glue is firm enough to keep the ties in place during the builiding proces. I have not yet tried if the template is even reuseable, even if it aint .......

📷 Image no longer available
Originally hosted at fbcdn-sphotos-c-a.akamaihd.net — the host went away before this archive was made.

39-The ties cut to length

📷 Image no longer available
Originally hosted at fbcdn-sphotos-b-a.akamaihd.net — the host went away before this archive was made.

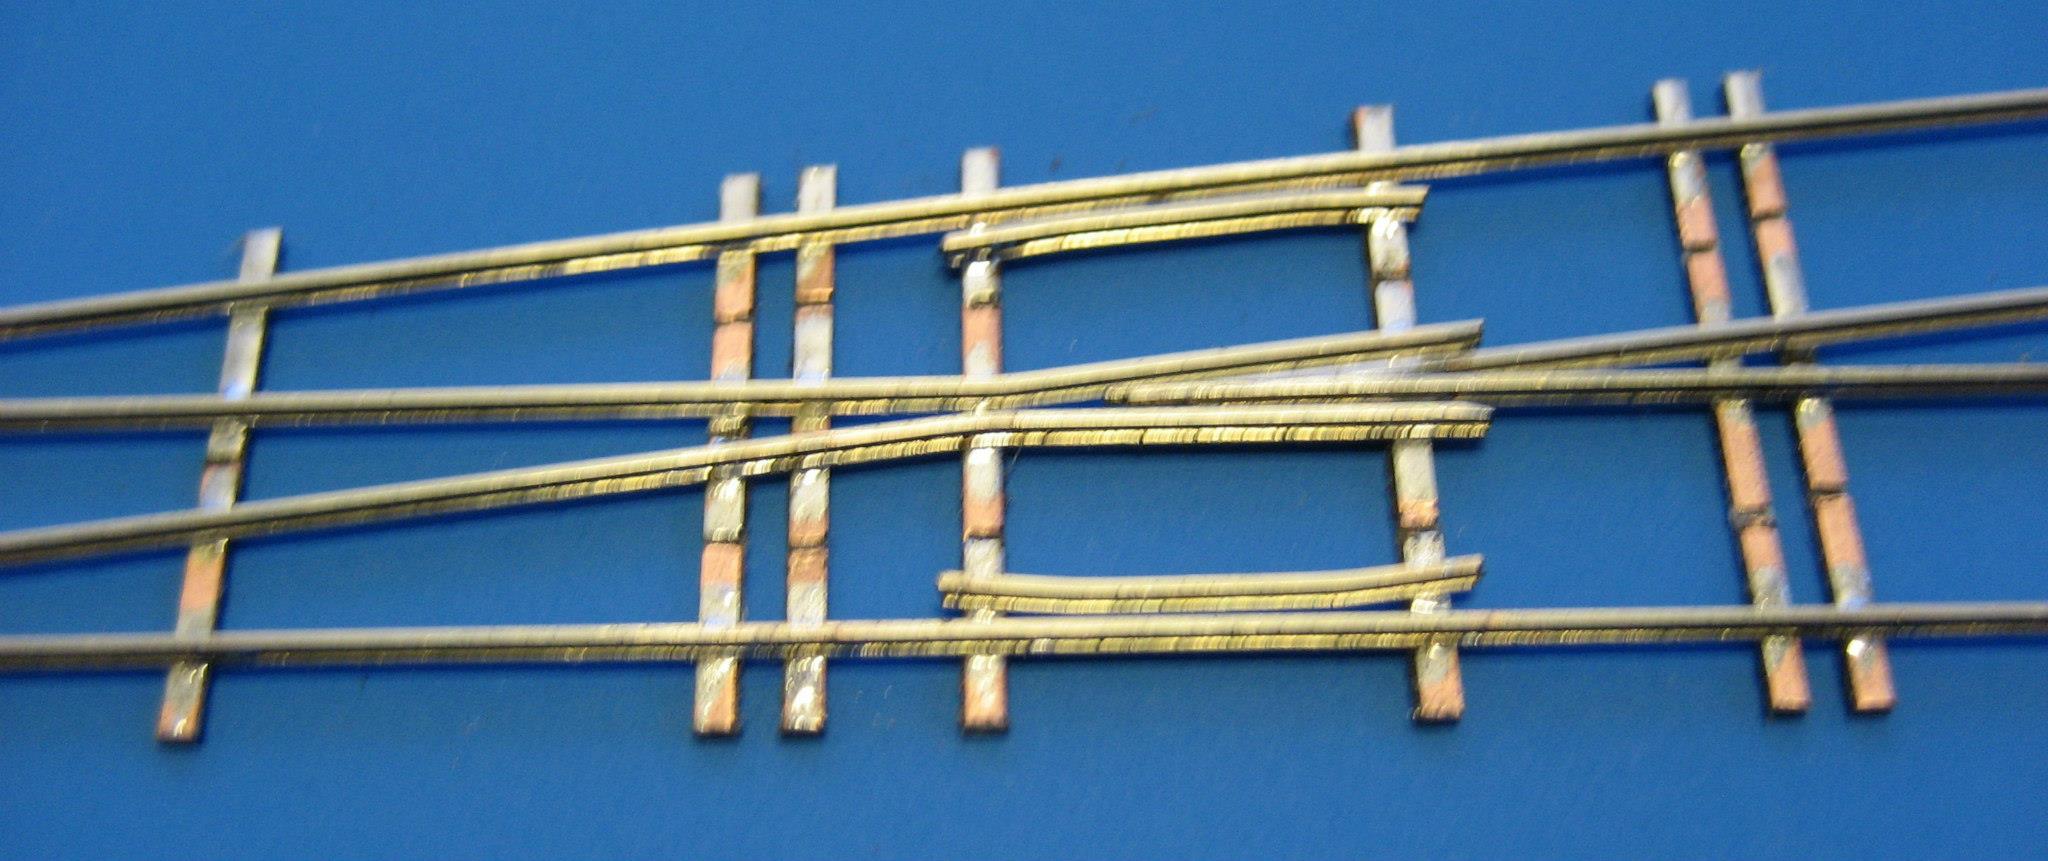
40-close-up of the left side of the crossing

_________________
Paul Bender

Everybody can shovel, firing is an art

📷 Image no longer available
Originally hosted at i279.photobucket.com — the host went away before this archive was made.

Firing this train was more fun then hard labor :-) © R. de Water


Top
 Profile  
 
PostPosted: Mon Feb 18, 2013 1:25 pm 
Offline
User avatar

Joined: Sun Sep 19, 2010 6:05 am
Posts: 51
Location: Rotterdam
Image
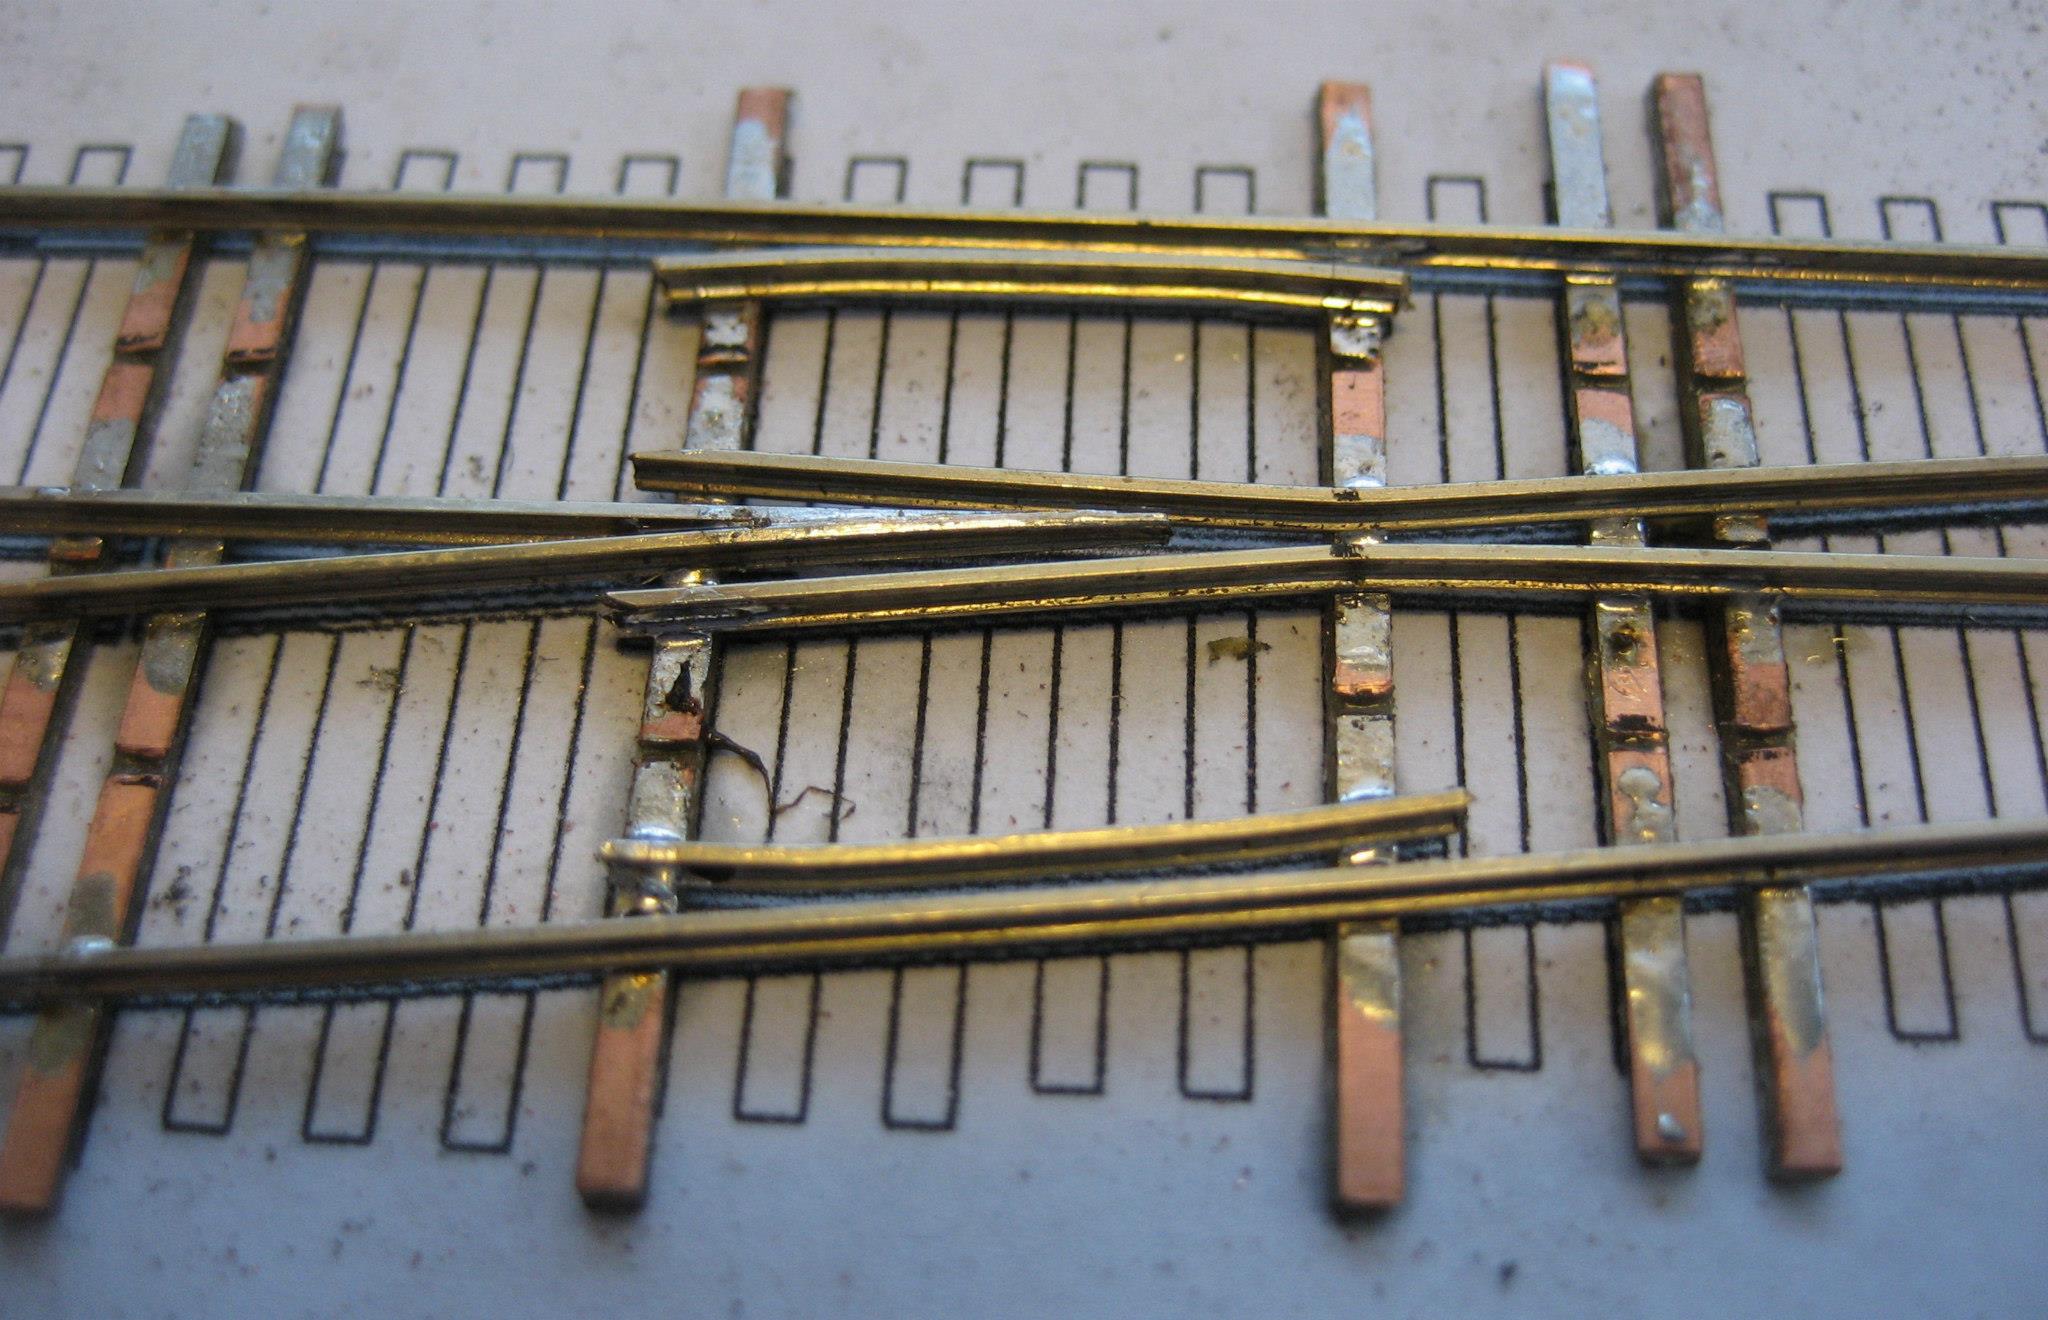
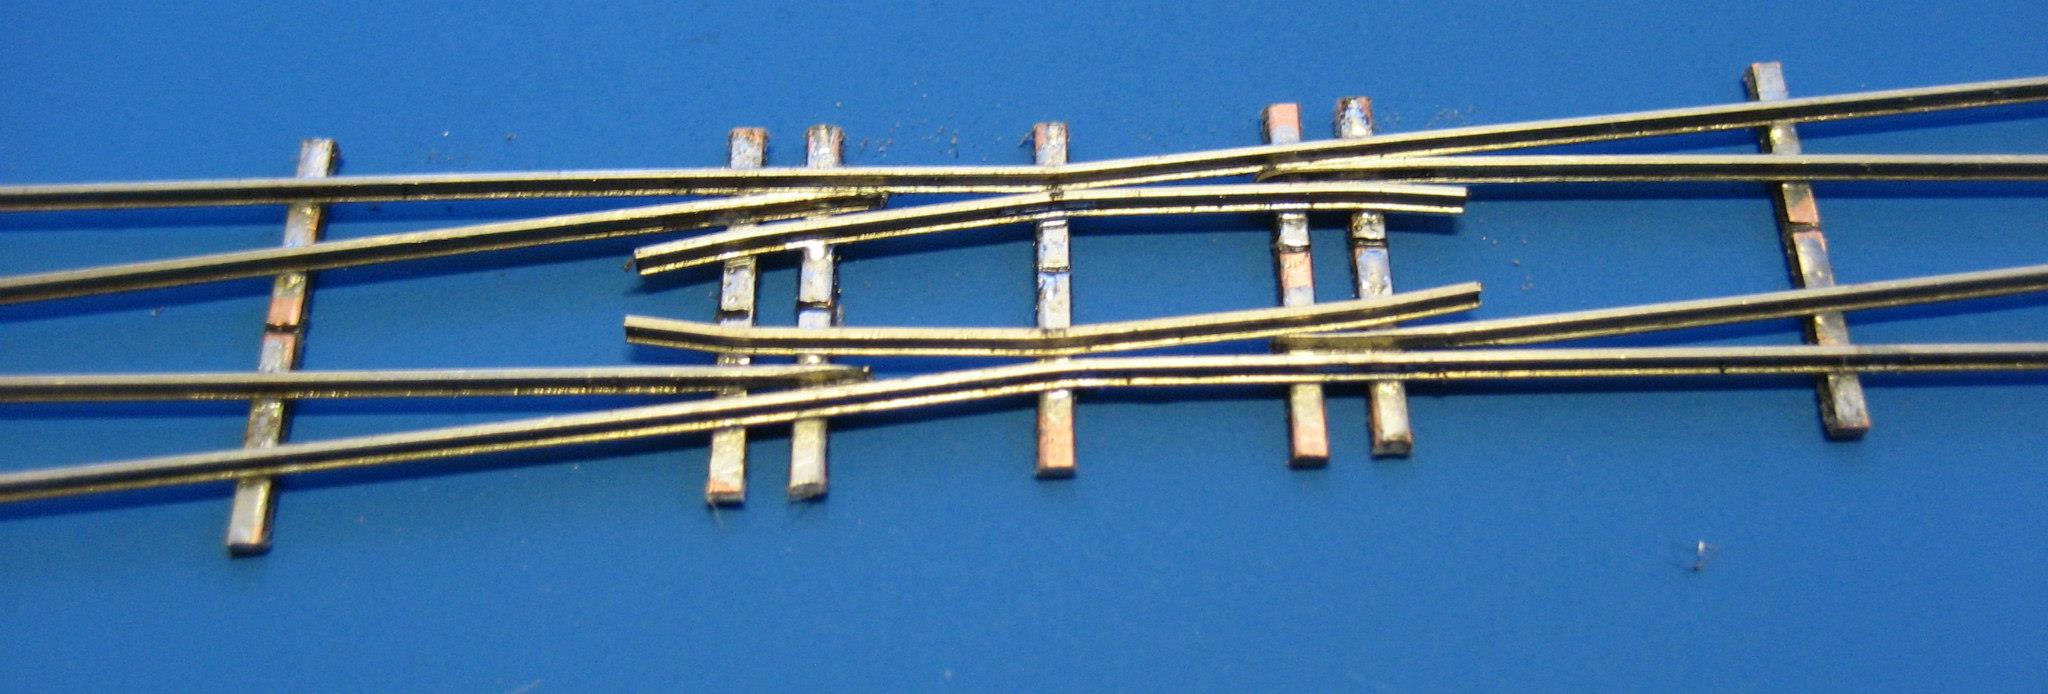
41-Close-up of the crossingcentre

Image
42-Close-up of the righthandside. Als not in focus, but so be it for now

Image
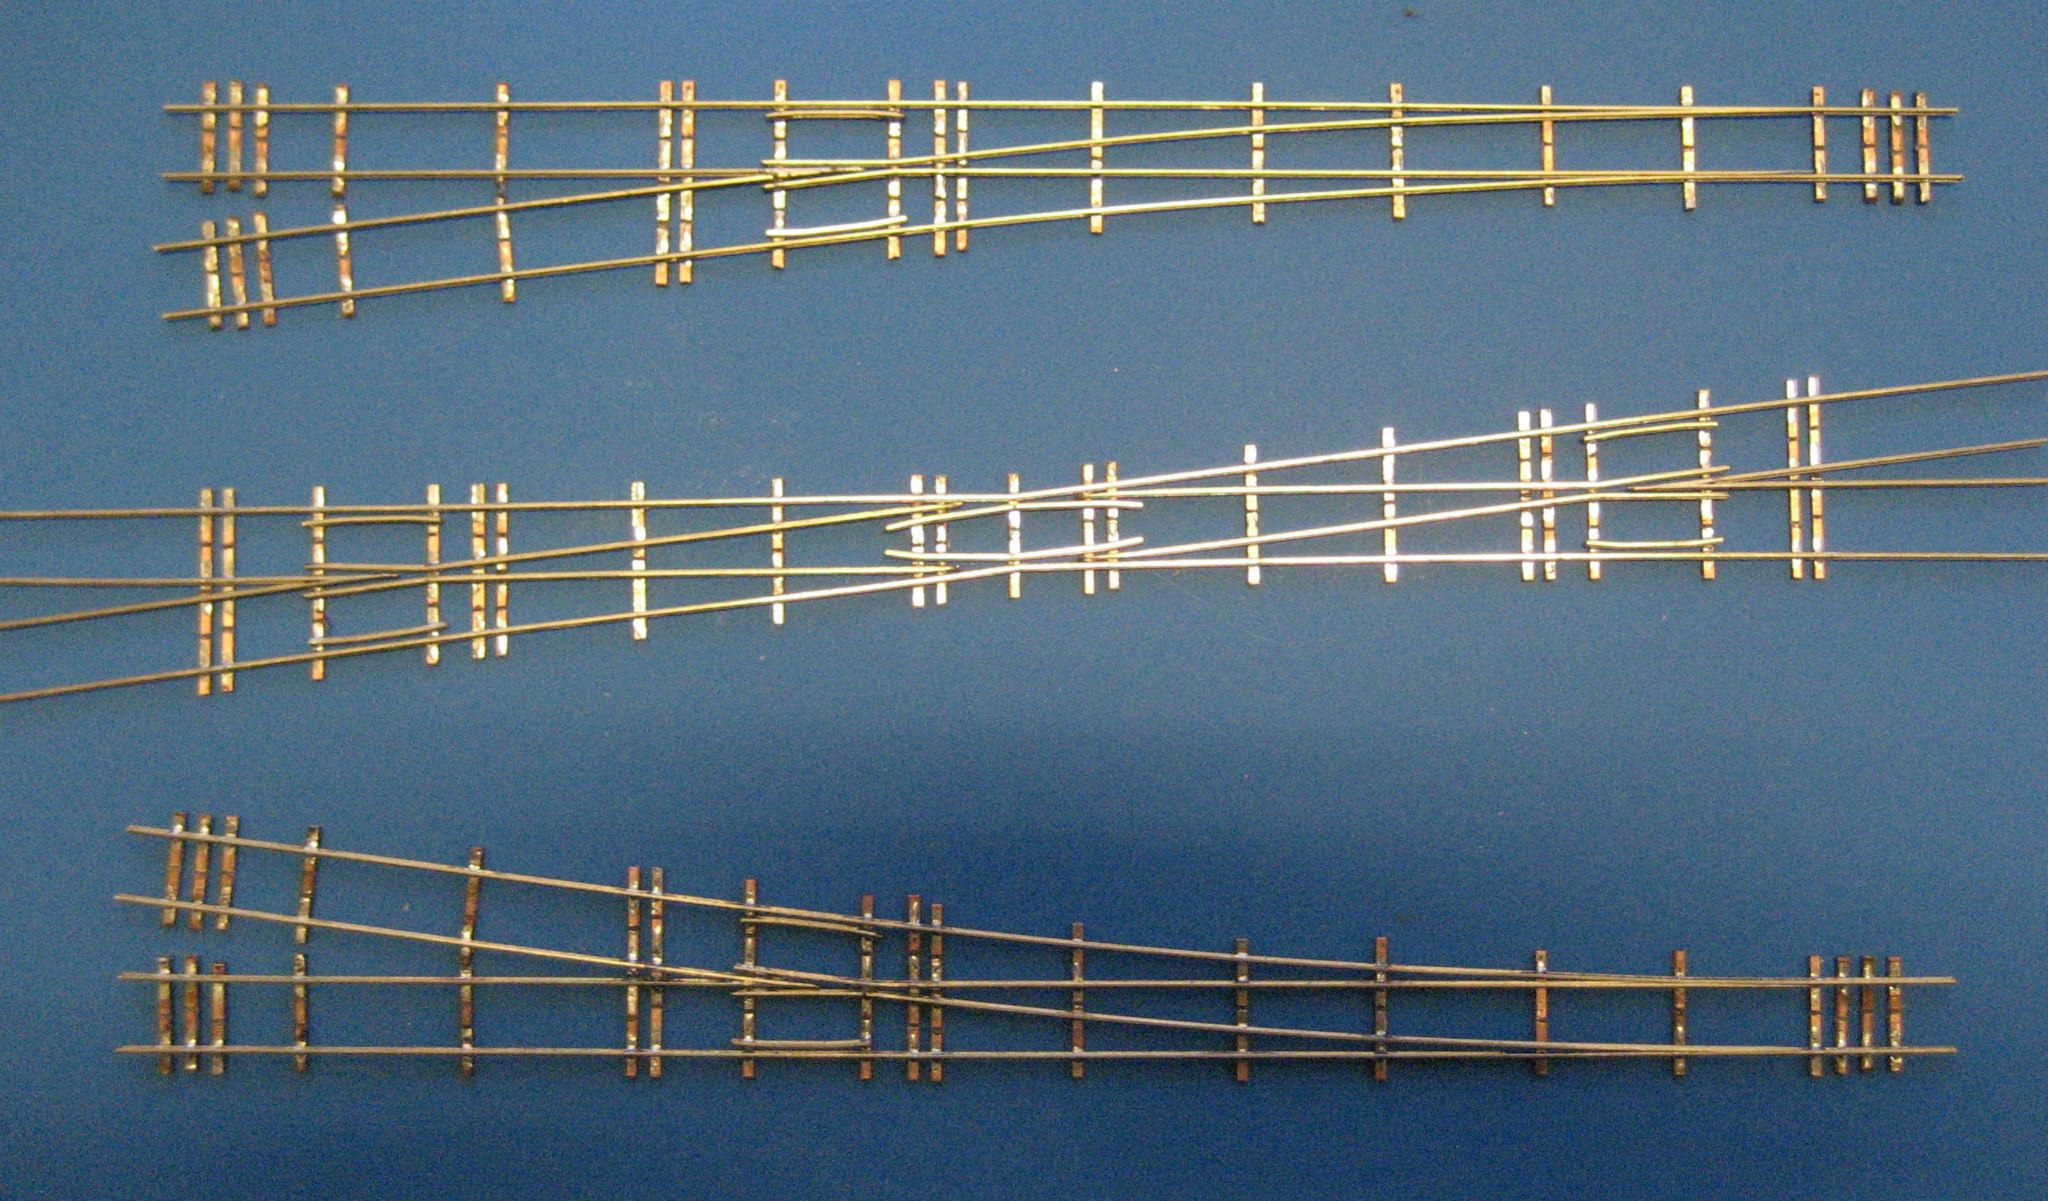
43-The two points are build with the FT jig and my first freehand build bit of track: a 1:9 crossing. I have not paid to much attention to the fine details. The main question was: can it be done and will it be a runner. The answer to both question is YES :P

The next BIG question is.............. Am I going to build a half slip in 1:9? by the looks of it FT does not have a jig for that :?

Watch this space 8)

_________________
Paul Bender

Everybody can shovel, firing is an art

📷 Image no longer available
Originally hosted at i279.photobucket.com — the host went away before this archive was made.

Firing this train was more fun then hard labor :-) © R. de Water


Top
 Profile  
 
PostPosted: Tue Feb 19, 2013 8:50 pm 
Offline

Joined: Tue Nov 24, 2009 6:59 pm
Posts: 40
Greetings,
What a nice piece of work!
Christopher


Top
 Profile  
 
Display posts from previous:  Sort by  
Forum locked This topic is locked, you cannot edit posts or make further replies.  [ 6 posts ] 

All times are UTC - 5 hours [ DST ]


Who is online

Users browsing this forum: No registered users and 1 guest


You cannot post new topics in this forum
You cannot reply to topics in this forum
You cannot edit your posts in this forum
You cannot delete your posts in this forum
You cannot post attachments in this forum

Search for:
cron
Powered by phpBB® Forum Software © phpBB Group